Microsoft Azure ADFS - is a cloud version of ADFS (ru).
Preparation
To use Azure AD, you must have:
We provide:
After all the necessary settings you should provide:
- Certificate (Base64) - download and transfer to Raketa.
- Azure AD Identifier - Azure AD Identifier.
- Login URL - your authorization web-page URL, which we will use to redirect users to your authentication system.
- Logout URL - your web-page URL, which we will use to redirect users after the logout.
Connecting an application to a client
- Log in to the client.
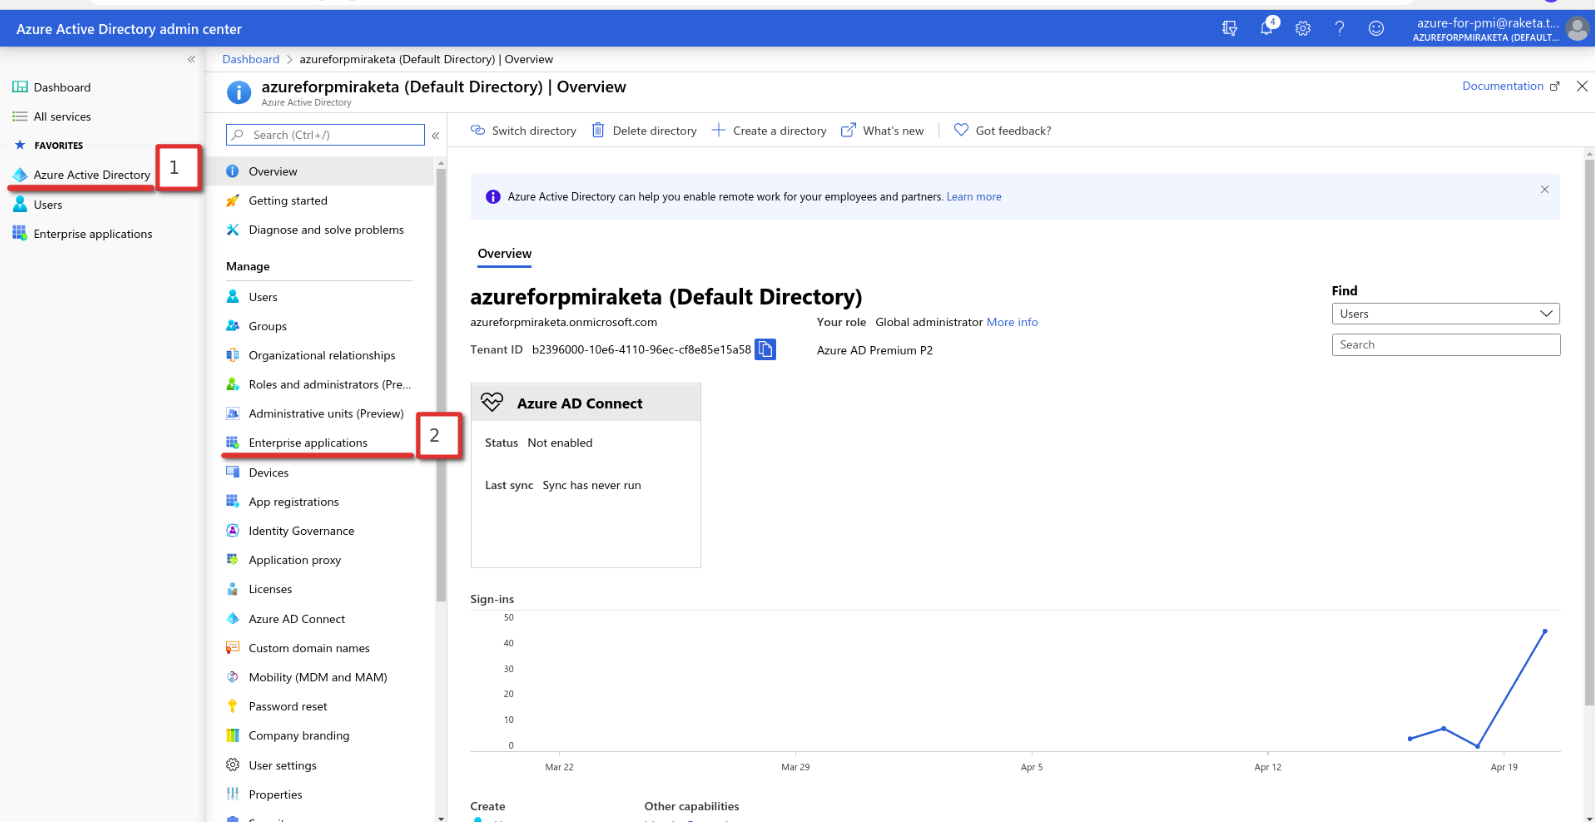
- Go to the Azure Active Directory section. Select in the side menu (or enter in the search bar) Azure Active Directory [1] → Enterprice applications [2].
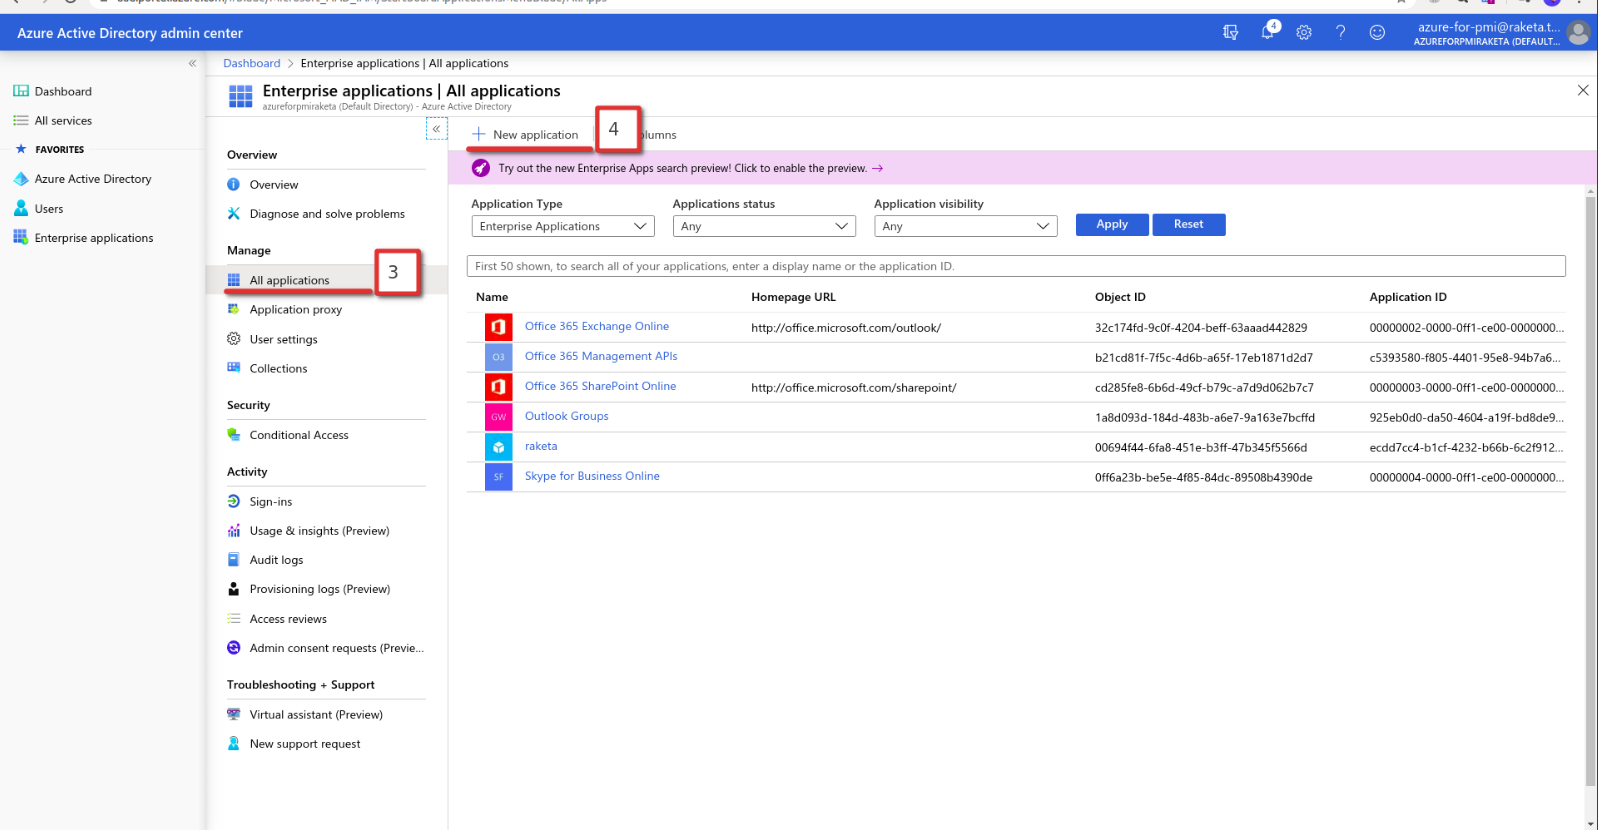
- Create a new application. Select All applications [3] in the side menu and press the "+ New application" button [4].
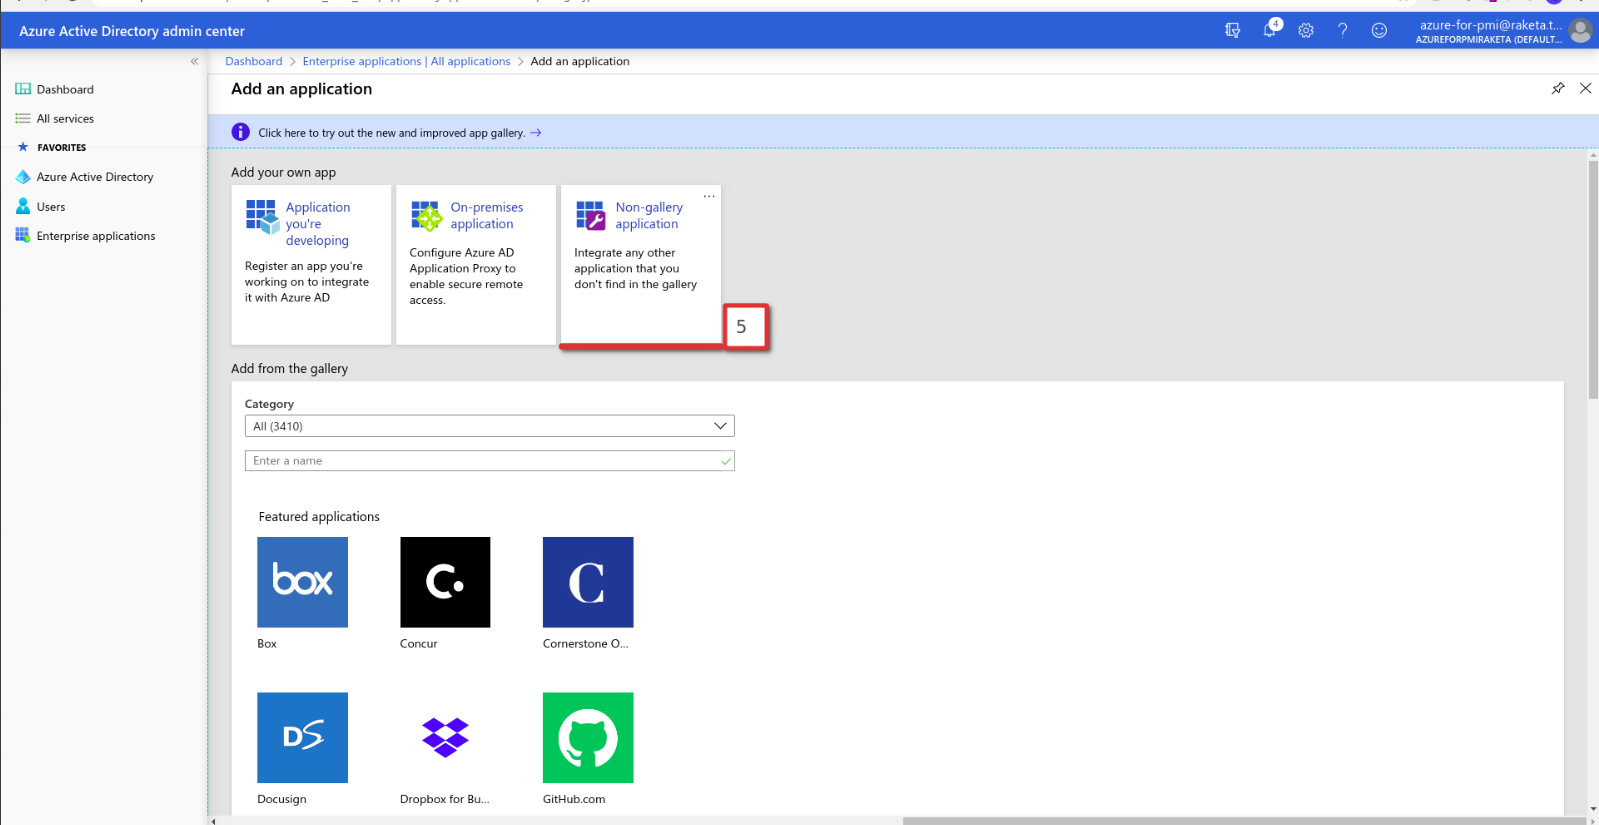
- Select an application type. Follow the link "Non-gallery application" [4].
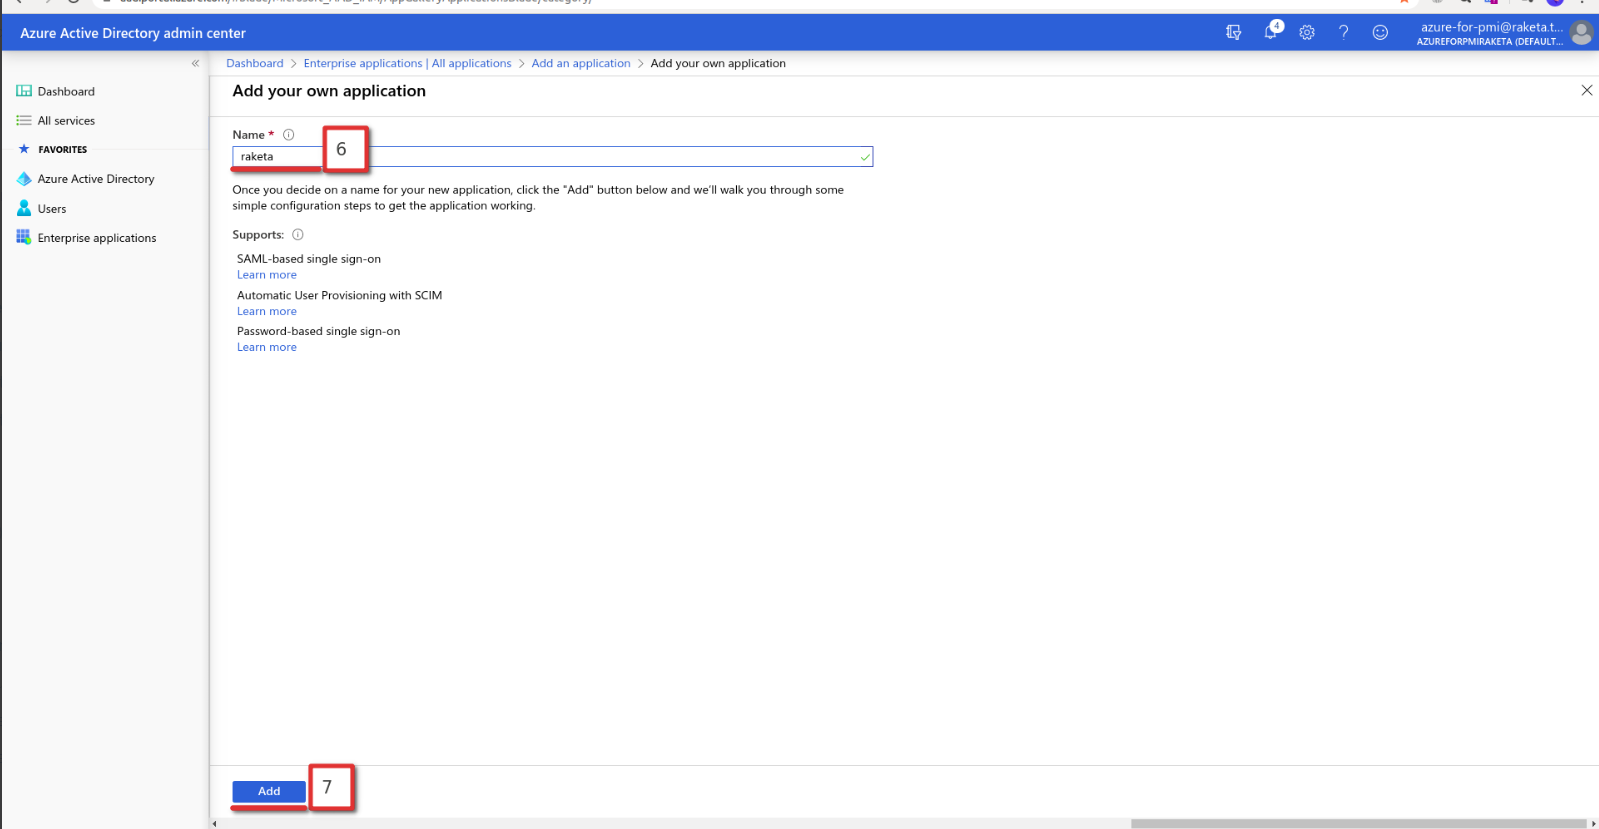
- Fill in the name of the new application in the "Name" field [6] (the name may be any convenient for you) and save the changes by clicking the "Add" button [7].
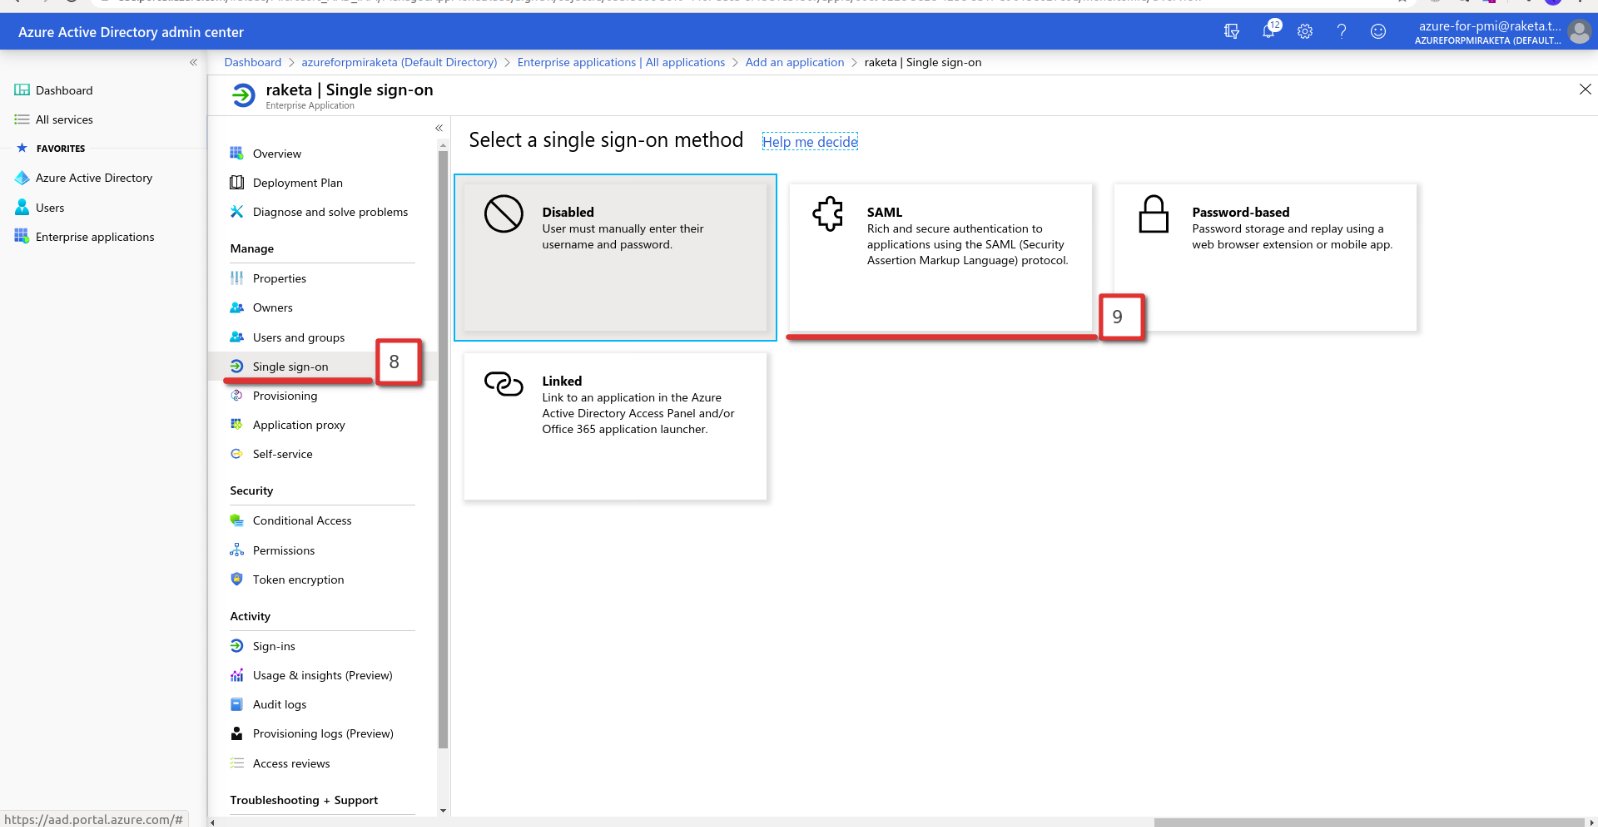
- Select the SSO method for the new application. Select Single sign-on [8] in the side menu and follow the link "SAML" [9].
- Specify SAML SSO settings, where:
- [10] Identifier (Entity ID) - https://raketa.travel
- [11] Reply URL (Assertion Consumer Service URL) - provides Raketa in the following format https://raketa.travel/sso/acs?clientId=YOUR_CLIENT_ID
- [12] Logout Url - provides Raketa in the following format https://raketa.travel/sso/slo?clientId=YOUR_CLIENT_ID
- [13] Unique User Identifier - parameter in Azure AD containing the e-mail of the user which will be used to log into the application
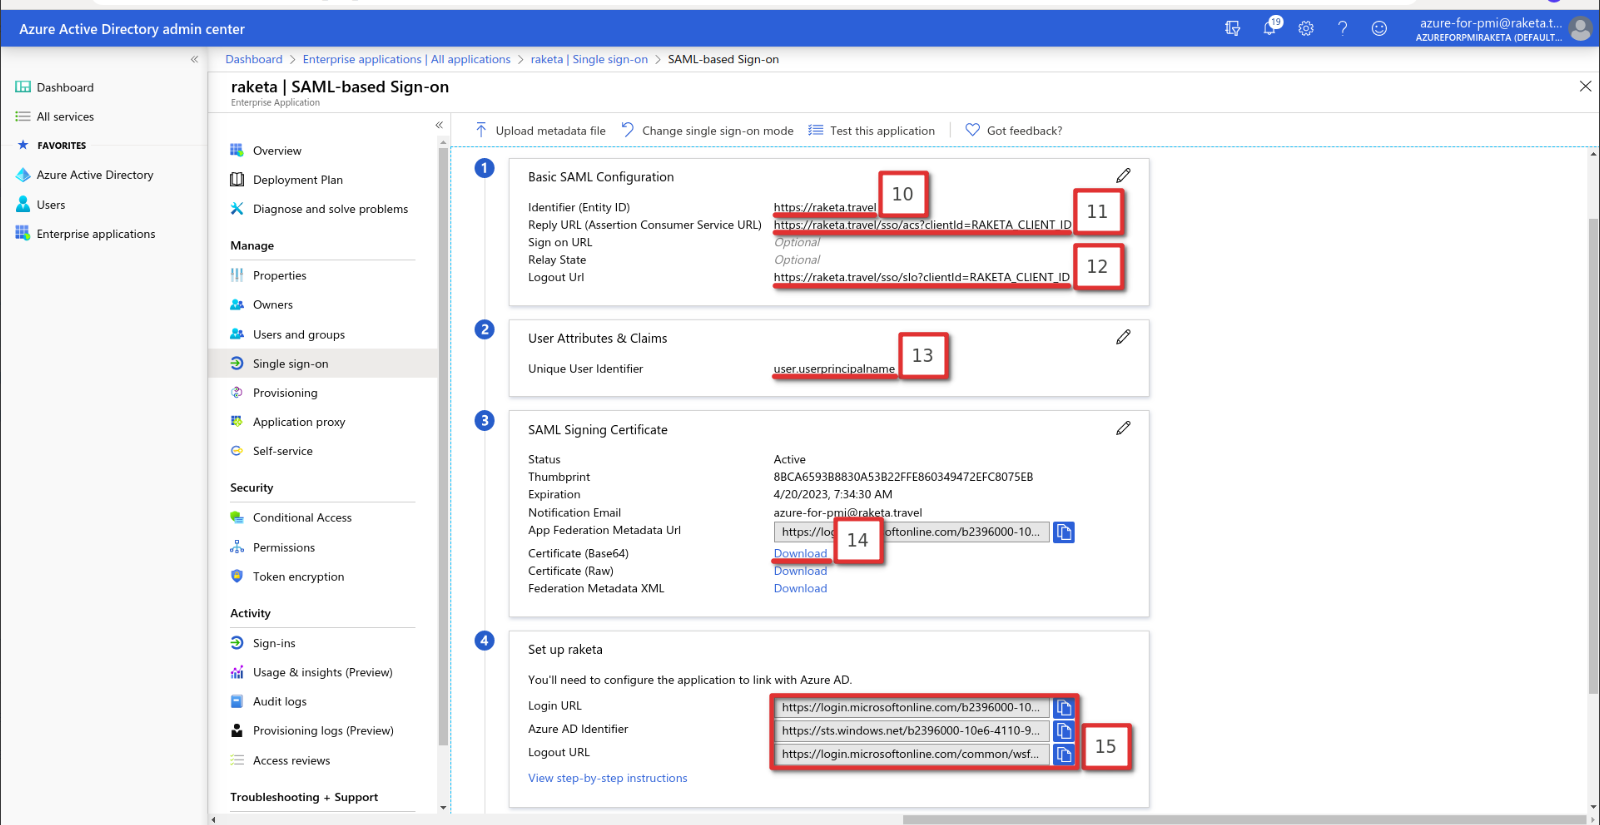
- Transfer the received data to the Raketa:
- [14] Certificare (Base64) - download and transfer to Raketa
- [15] Azure AD Identifier, Login URL, Logout URL


