Raketa Travel поддерживает технологию единого входа (supports single sign-on , (SSO) через technology through SAML 2.0. Поставщиком учётных данных (The SAML 2.0 identity provider , (IDP) SAML 2.0 может быть любая система, в том числе, собственная инсталляция can be any system, including your own Active Directory Federation Services (ADFS) сервераserver installation.
ADFS – это сервис, предоставляемый Microsoft как стандартная роль Windows Server. Она предоставляет возможность входить в WEB-сервисы, используя существующие данные аутентификации Active Directory. В большинстве случаев это логин/пароль от доменной учётной записи.
1. Подготовка
Для использования ADFS необходимо иметь:
- Сервер с запущенным Microsoft Windows Server. Скриншоты в этой инструкции сделаны с использованием версии 2016.
- Инсталляцию Active Directory, в которой все пользователи имеют заполненный e-mail адрес.
- SSL сертификат для вашей страницы входа ADFS.
Мы предоставляем:
is a service provided by Microsoft as a standard Windows Server role. It provides the ability to log into WEB services using existing Active Directory authentication data. In most cases, this is the login / password for a domain account.
1. Preparation
To use ADFS, you must have:
- Server running Microsoft Windows Server. The screenshots in this tutorial were taken using the 2016 version.
- An Active Directory installation in which all users have a completed e-mail address.
- SSL certificate for your ADFS login page.
We provide:
- Login URL in the format URL логина в формате https://raketa.travel/sso/acs?clientId=YOUR_CLIENT_ID.
- URL логаута в формате Logout URL in the format https://raketa.travel/sso/slo?clientId=YOUR_CLIENT_ID.
After all necessary settings, you should provide:
Full table File.xlsxПосле всех необходимых настроек вам следует предоставить:
- Entity ID – URL вашего внутреннего корпоративного порталаYour internal corporate portal URL.
- SALM SAML SSO URL – Your login page URL вашей страницы авторизации, который мы будем использовать для перенаправления пользователей в вашу систему идентификации, which we will use to redirect users to your identity system.
- Remote logout URL – ваш URL, который мы будем использовать для перенаправления пользователей после их выхода из системы.
- Thumbprint – отпечаток SHA-256 сертификата SAML подписи токена.
- Your URL, which we will use to redirect users after they log out.
- X509 Certificate – auto-generated certificate file. You need to download, item 5.
After meeting the basic requirements, install ADFS. Configuration and installation are detailed in the Microsoft Knowledge BaseПосле удовлетворения базовых требований установите ADFS. Конфигурация и установка подробно описаны в базе знаний Microsoft:
https://docs.microsoft.com/ruen-ruus/windows-server/identity/ad-fs/deployment/deploying-a-federation-server-farm
После полной установки ADFS посмотрите значение After ADFS is fully installed, see the value for "SAML 2.0 / W-Federation" в разделе "Конечные точки". Если вы не меняли настройки во время установки, то значение будет in the "Endpoints" section. If you did not change the settings during installation, the value will be "/ adfs / ls /".
2.
...
В этот момент вы уже готовы настроить связь между ADFS и Raketa Travel. Эта связь устанавливается через Отношения доверия проверяющей стороны.

Adding a Relying Party Trusts
At this point, you are ready to set up communication between ADFS and Raketa Travel. This relationship is established through the Relying Party Trust..
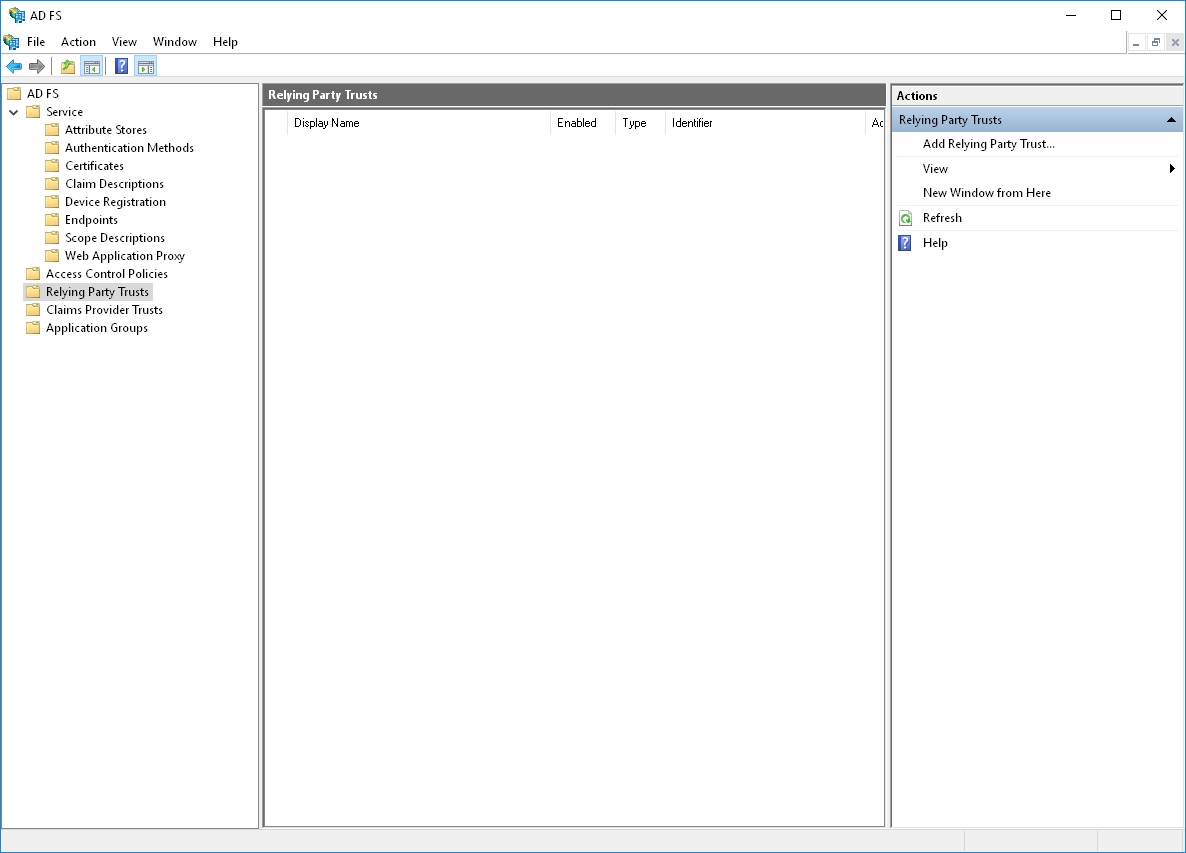
Open the Relying Party Trusts directory in the AD FS Management snap-in. In the action bar, select Add Relying Party Trusts. This action will launch the configuration wizard.
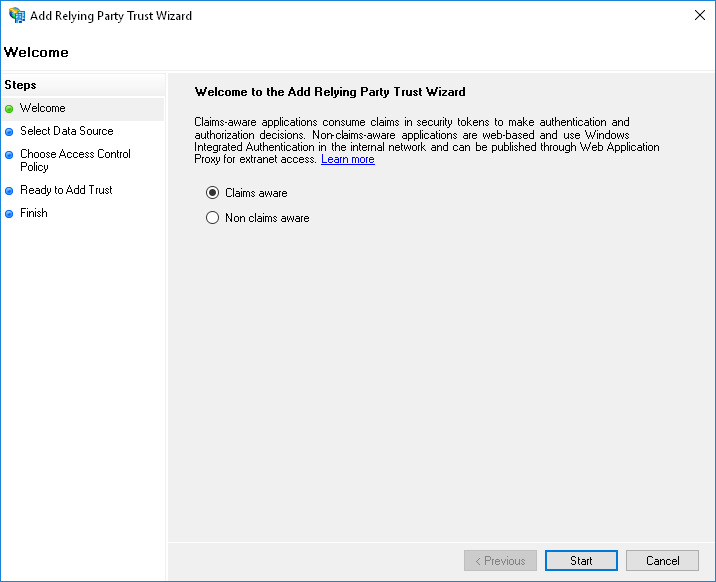
In the Select Data Source step, select Enter data about relying party manually.

In the next step, provide any desired name and notes.

If the next step prompts you to select a profile, select "AD FS profile".
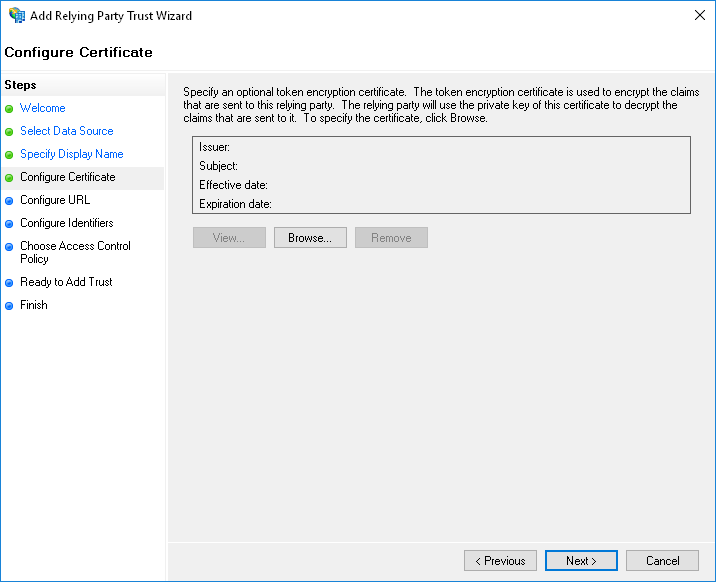
At the step "Configure Certificate", you do not need to specify an additional certificate.
In the Configure URL step, enable SAML 2.0 WebSSO support and enter the login URL we provided in the format
Откройте директорию "Отношения доверия проверяющей стороны" в оснастке "Управление AD FS". На панели действий выберите "Добавить отношения доверия проверяющей стороны". Это действие запустит мастер настройки.

На шаге "Выбор источника данных" выберите "Ввод данных о проверяющей стороне вручную".

На следующем шаге укажите любое желаемое имя и примечания.

Если на следующем шаге предлагается выбрать профиль, выберите "Профиль AD FS" ("AD FS profile").
На шаге "Настройка сертификата", дополнительный сертификат указывать не нужно.

На шаге "Настройка URL-адреса" включите поддержку протокола SAML 2.0 WebSSO и введите предоставленный нами URL логина в формате https://raketa.travel/sso/acs?clientId=YOUR_CLIENT_ID


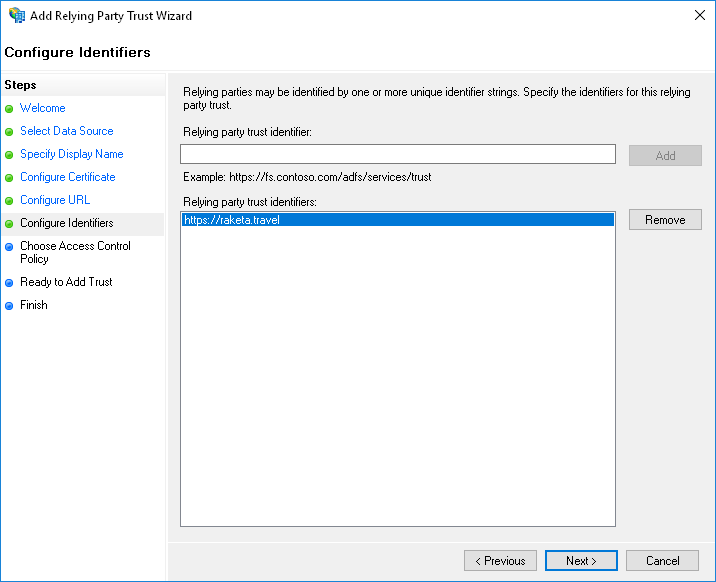
На шаге "Настройка идентификатора" введите In the "Configure Identifiers" step, enter "https://raketa.travel" и нажмите кнопку "Добавить"and click the "Add" button.

In the next steps, you can configure additional parameters that apply to this RelationshipНа следующих шагах вы можете настроить дополнительные параметры, применяемые к данному Отношению.
3.
...
Configuring the claim issuance policy
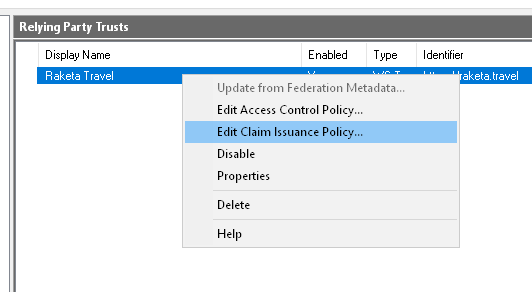
After you create the Relying Party Trust, you need to configure the claim issuance policy. To do this, from the Relying party trusts context menu, select Edit Claim Issuance Policy.
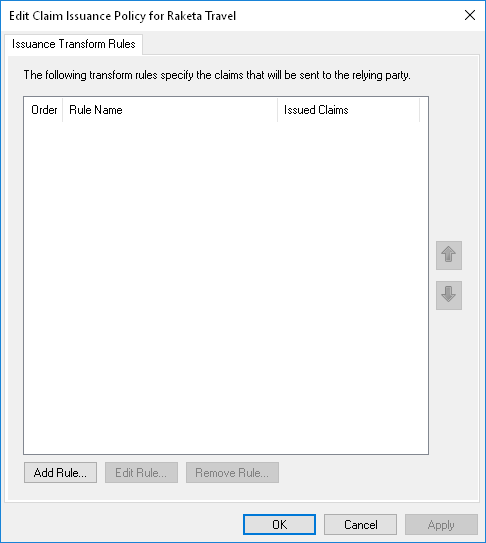
In the window, you need to add 2 rules.
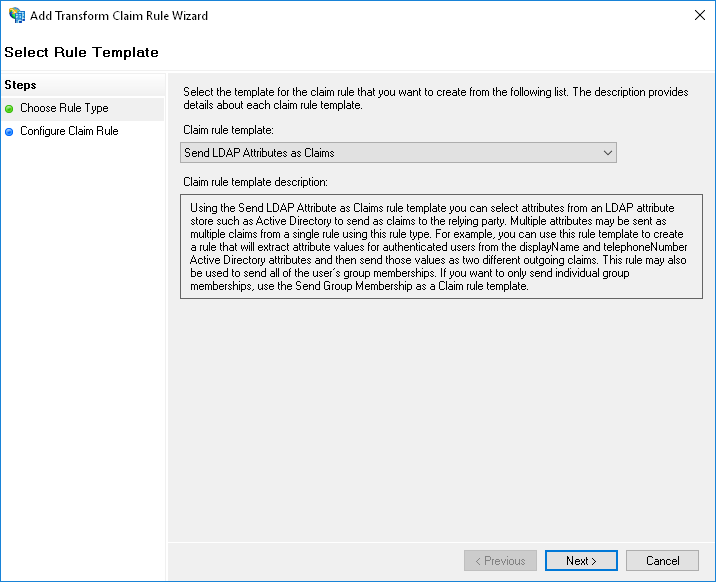
First rule:
- Claim rule template: Send LDAP Attributes as Claims.
- Attribute store
...
После создания Отношения доверия проверяющей стороны необходимо настроить политику подачи запросов. Для этого в контекстном меню Отношения выберите "Изменить политику подачи запросов".


В открывшемся окне необходимо добавить 2 правила.
Первое правило:
- Шаблон правила: Отправка атрибутов LDAP как утверждений.
- Хранилище атрибутов: Active Directory.
- СопоставлениеMapping: E-Mail-Addresses → Адрес электронной почты-> Email Address.


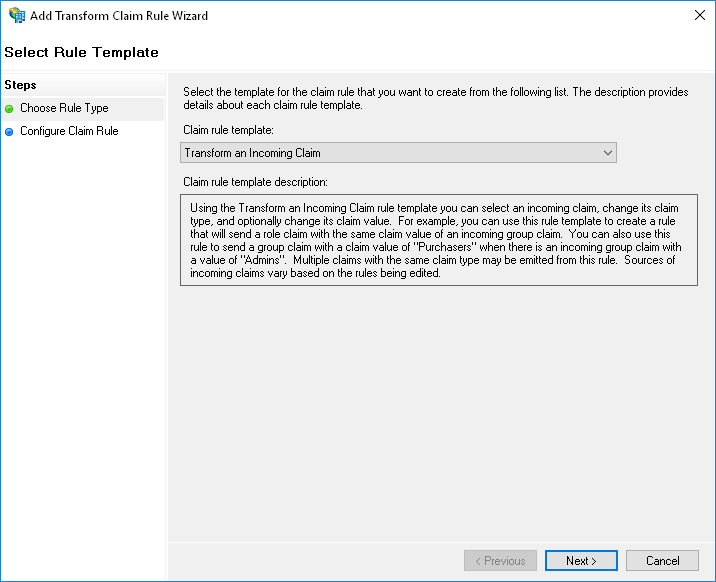
Второе правило.
- Шаблон правила: Преобразование входящего утверждения.
- Тип входящего утверждения: Адрес электронной почты.
- Тип исходящего утверждения: ИД имени.
- Формат ИД исходящего имени: Электронная почта.
- Пройти по всем значениям утверждений – выбрано.


4. Дополнительная настройка Отношения доверия
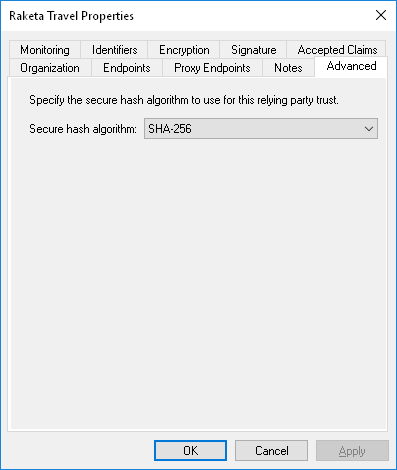
После настройки политик подачи запросов необходимо дополнительно настроить Отношение. Для этого в контекстном меню Отношения выберите "Свойства".

На вкладке "Дополнительно" убедитесь, что выставлен алгоритм хеширования SHA-256.

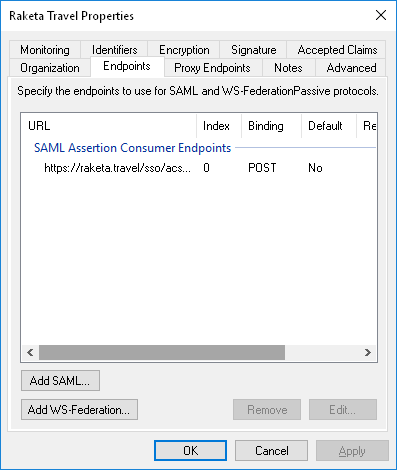
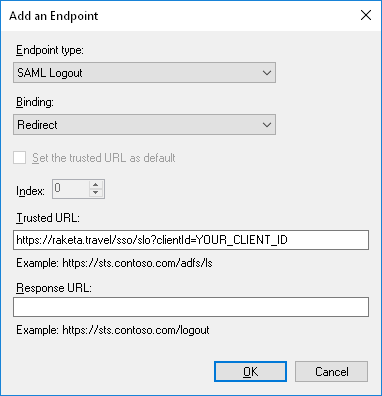
На вкладке "Конечные точки" добавьте точку завершения сеанса. Для этого нажмите кнопку "Добавить SAML". В открывшемся окне укажите:

Second rule:
- Claim rule template: Transform an Incoming Claim.
- Incoming Claim Type: Email Address.
- Outgoing Claim Type: Name ID.
- Outgoing Name ID format: Email.
- Pass through all claim values – selected.

4. Additional Configuring: Relying Party Trusts
After configuring claim issuance policies, you need to further configure Relying Party Trusts. To do this, in the context menu of the Relying Party Trusts, select "Properties".

On the "Advanced" tab, make sure that the SHA-256 hashing algorithm is set.
On the Endpoints tab, add an endpoint. To do this, click the "Add SAML" button. In the window that opens, specify:
- Endpoint typeТип конечной точки: Завершение сеанса SAML.
- ПривязкаBinding: Redirect.
- Доверенный Trusted URL-адрес: предоставленный нами URL логаута в форматеLogout URL that we have provided in the formathttps://raketa.travel/sso/slo?clientId=YOUR_CLIENT_ID


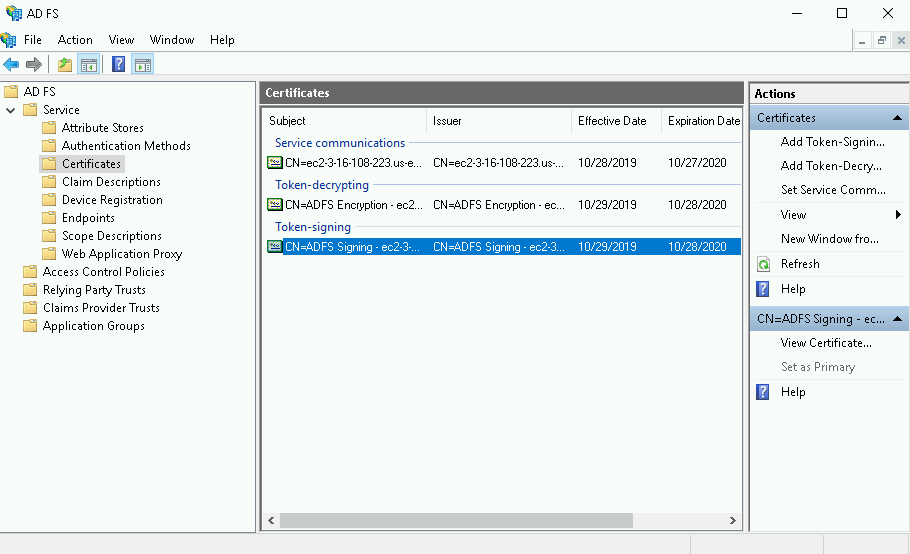
5. Получение отпечатка сертификата подписи токена
Подтверждение входящих запросов на стороне Raketa Travel происходит с использованием отпечатка токена подписи ADFS. Для его получения откройте консоль PowerShell от имени пользователя с правами администратора и выполните команду
Get-AdfsCertificate Token-Signing.
Вы найдете отпечаток в строке вывода Thumbprint.
Якорь Obtaining the thumbprint of the token signing certificate Obtaining the thumbprint of the token signing certificate
5. Obtaining of the token certificate
| Obtaining the thumbprint of the token signing certificate | |
| Obtaining the thumbprint of the token signing certificate |
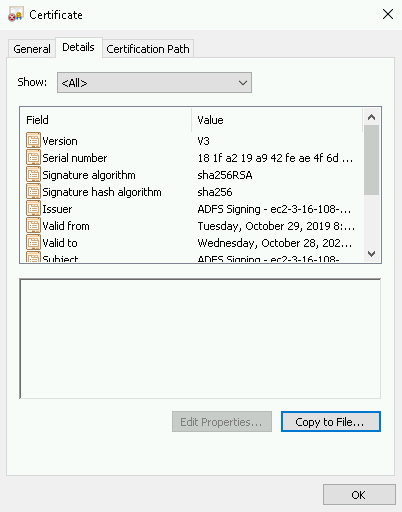
Open the ADFS management snap-in, select ADFS > Service > Certificates, then double-click on the certificate under Token-signing. You can also right-click the field, then select View Certificate in the context menu.
On the Certificate screen, open the Details tab, select Copy to File, then select OK.
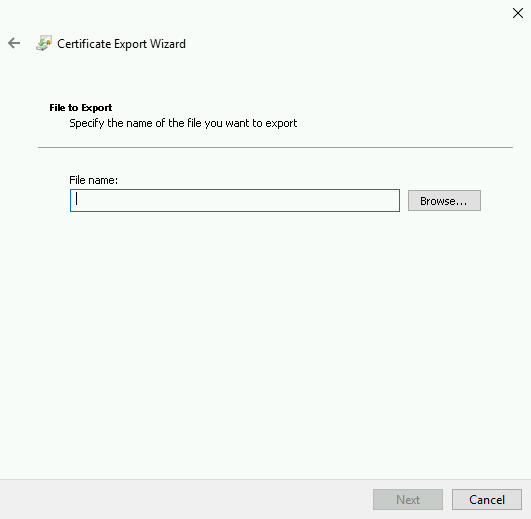
On the Certificate Export Wizard screen, select Next.

Select Base-64 encoded X.509 (.CER), then select Next again.

On the Certificate Export Wizard screen, select Browse to specify the location where you want the Identity Provider Certificate to be exported, then specify the file name.
Select Save. On the Certificate Export Wizard screen, verify the file path is correct, then select Next.
In the Completing the Certificate Export Wizard, select Finish, then select OK to confirm the export was successful.

...