Quick adding Raketa from the Okta Integration Network is available.
If you select the Raketa application from Featured Integrations in step 4, you can skip steps 5-7. The application data will be filled in automatically.
Preparation
To use Okta you must have:
- Okta administrator account.
Raketa provides you:
- Single sign on URL in the following format: https://raketa.travel/sso/acs?clientId=RAKETA_CLIENT_ID, where RAKETA_CLIENT_ID - client id in Raketa.
- Audience URI (SP Entity ID) in the following format: https://raketa.travel - service provider object identifier.
After all the necessary settings you should provide to Raketa:
- X.509 Certificate - auto-generated certificate file.
- Identity Provider Issuer - Okta identifier.
- Identity Provider Single Sign-On URL - your authorization web-page URL, which we will use to redirect users to your authentication system.
Application configuration
- Log in to the Okta website: https://login.okta.com/.
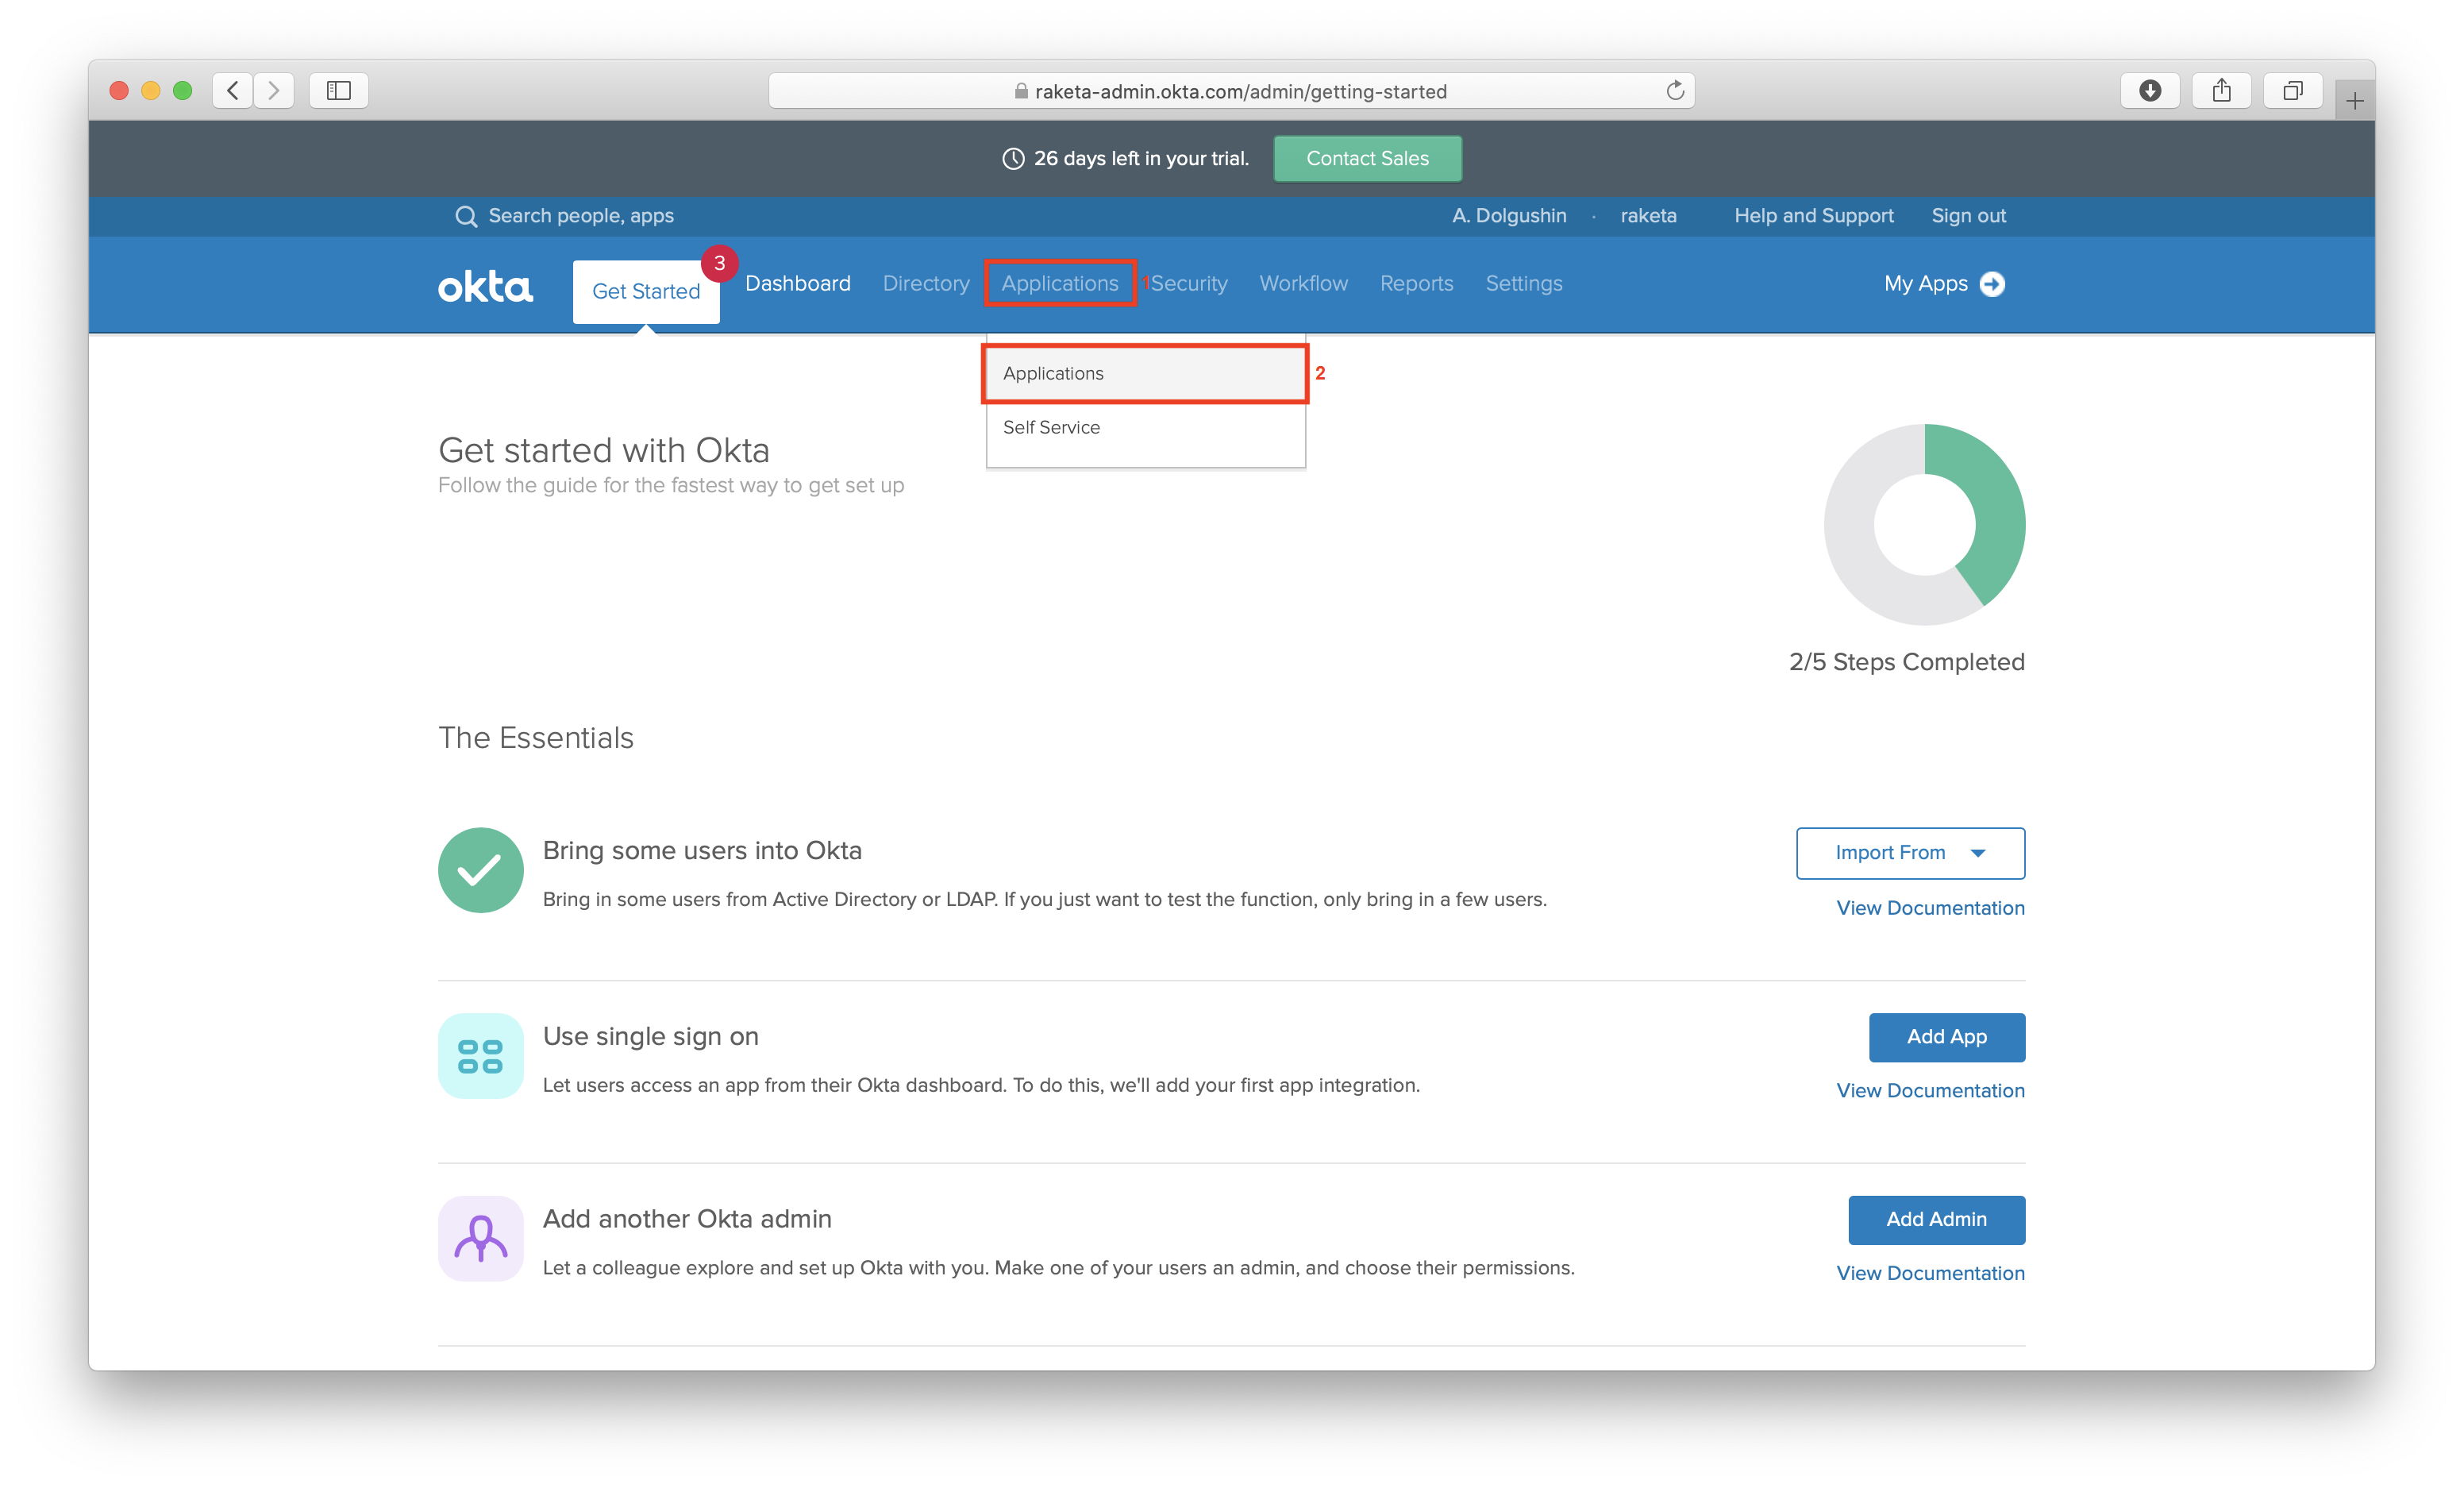
- Select application setting from the main menu "Application" [1] → "Applications" [2].
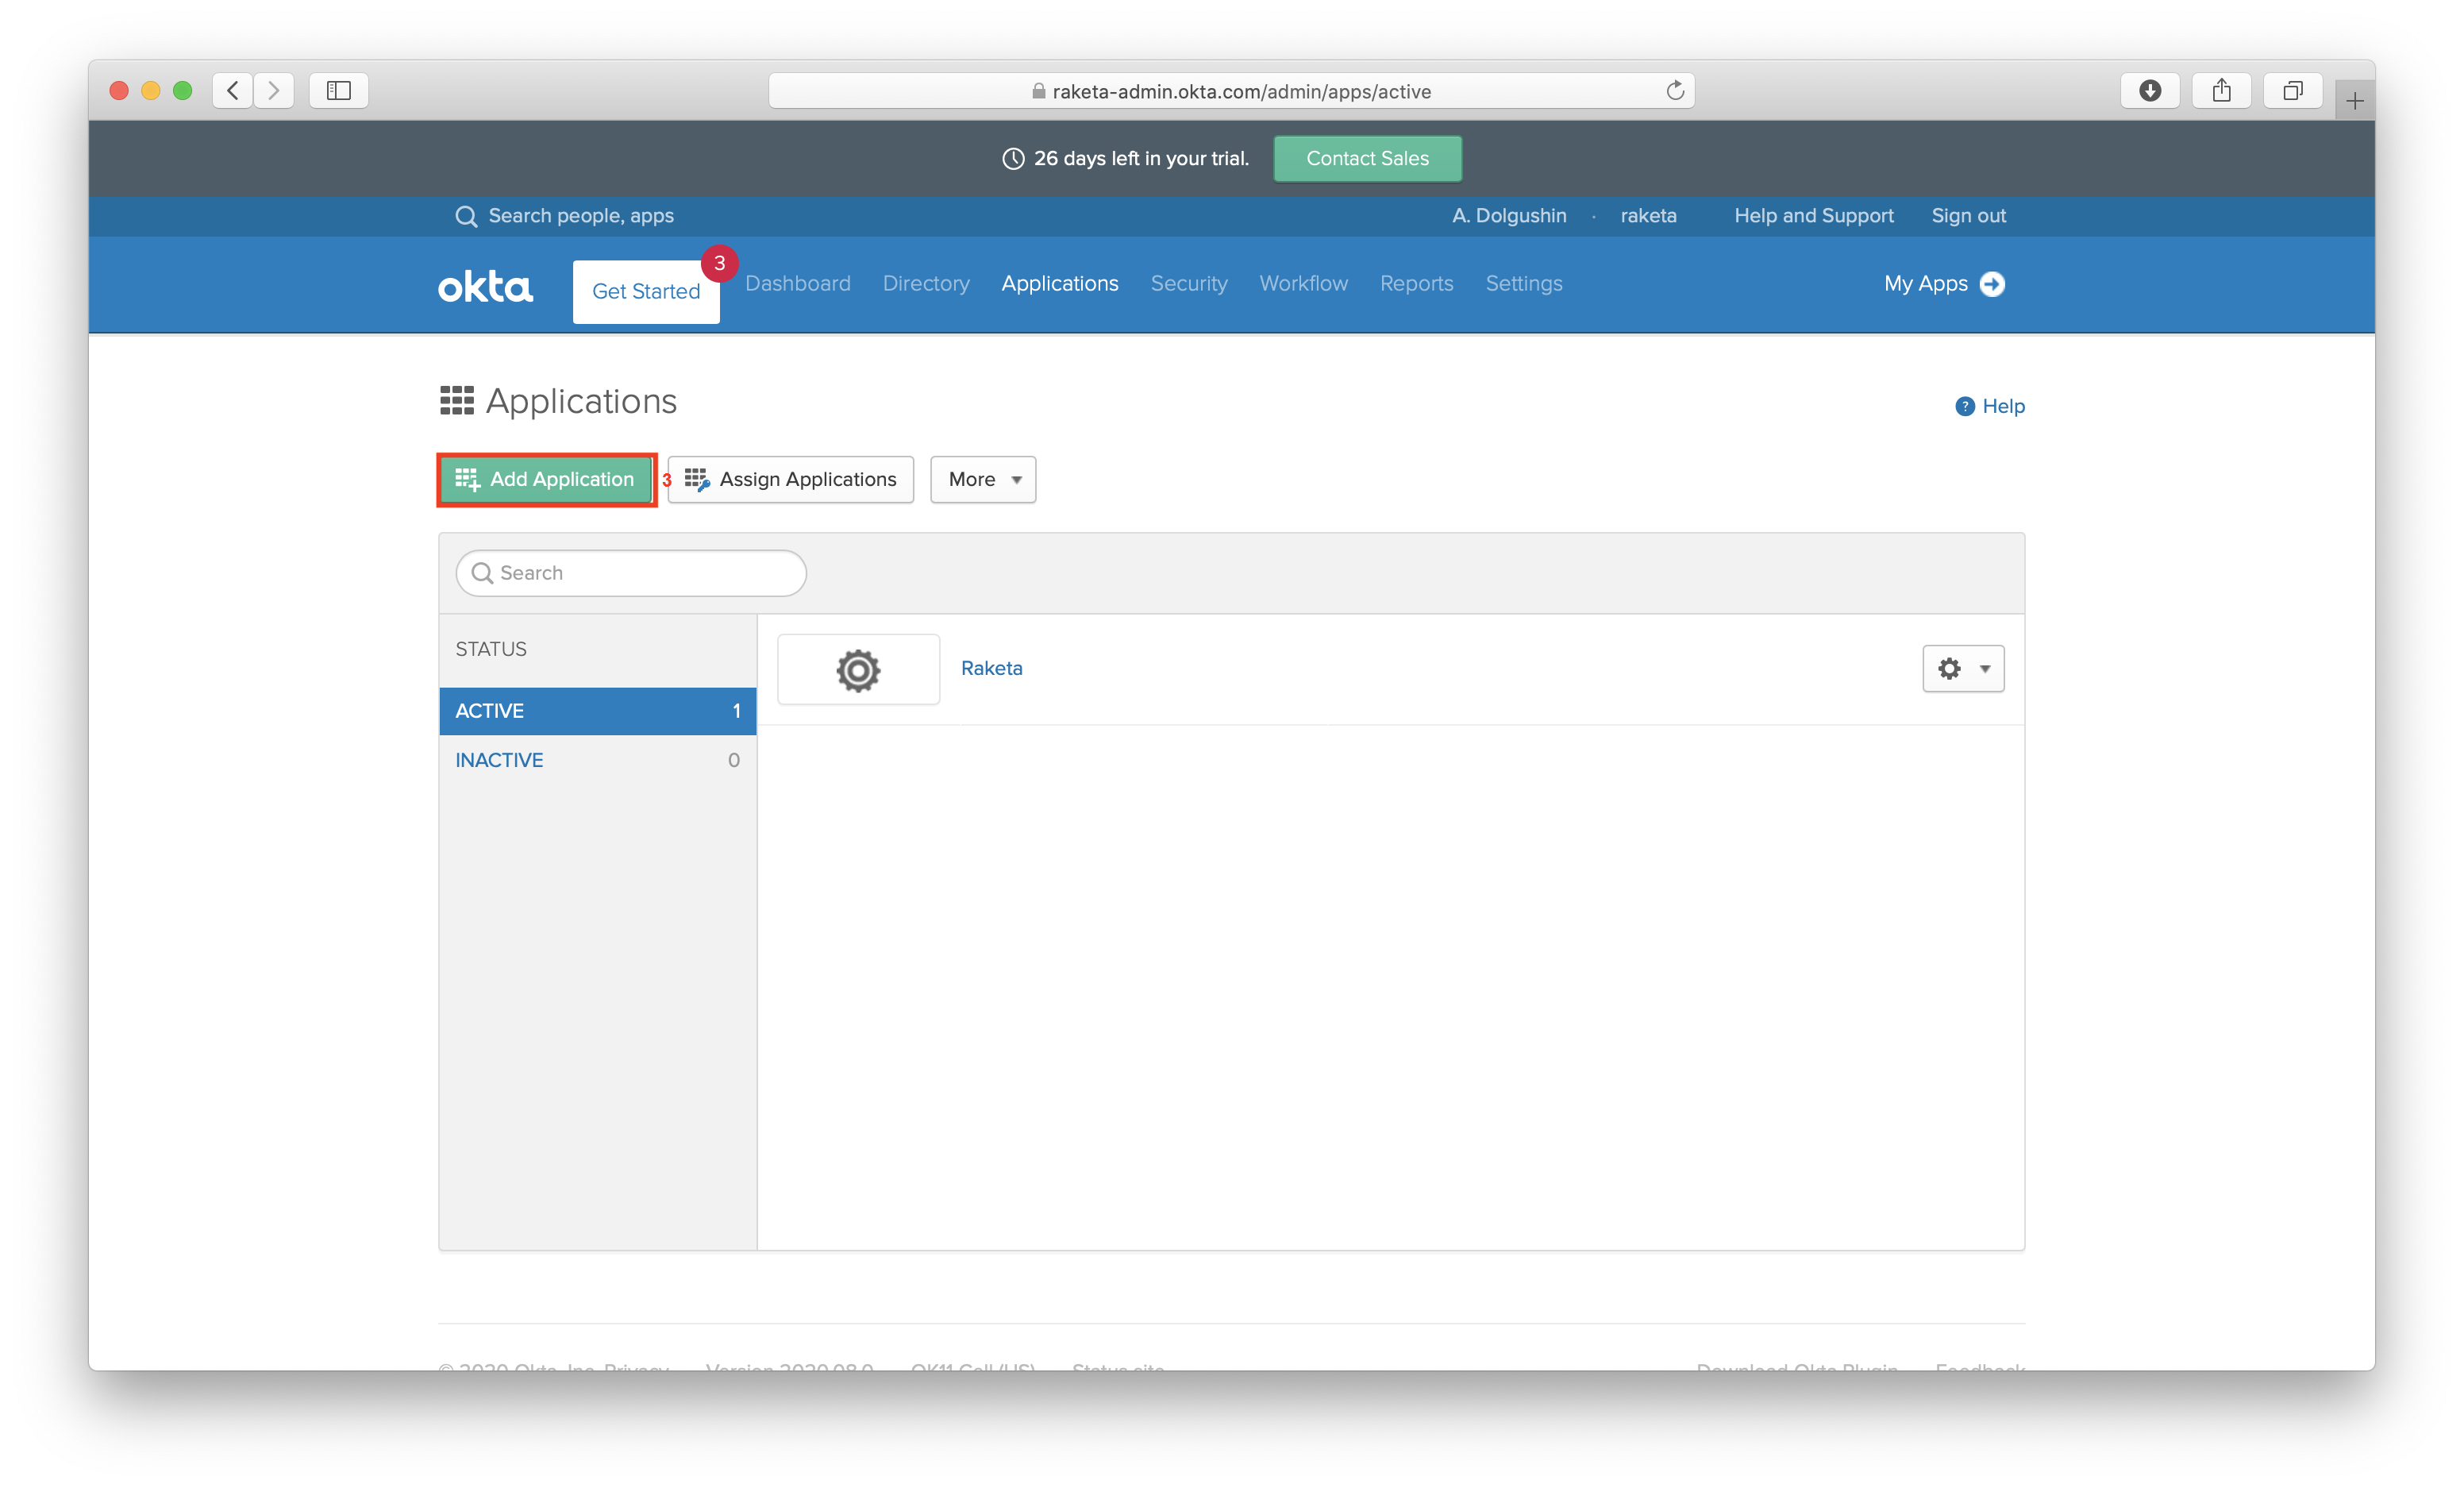
- Click the "Add Application" button [3] to add a new application.
- On the next screen click the "Create Application" button [4].

- In the pop-up window select a platform - "Web" [5] and a sing on method - "SAML 2.0" [6].

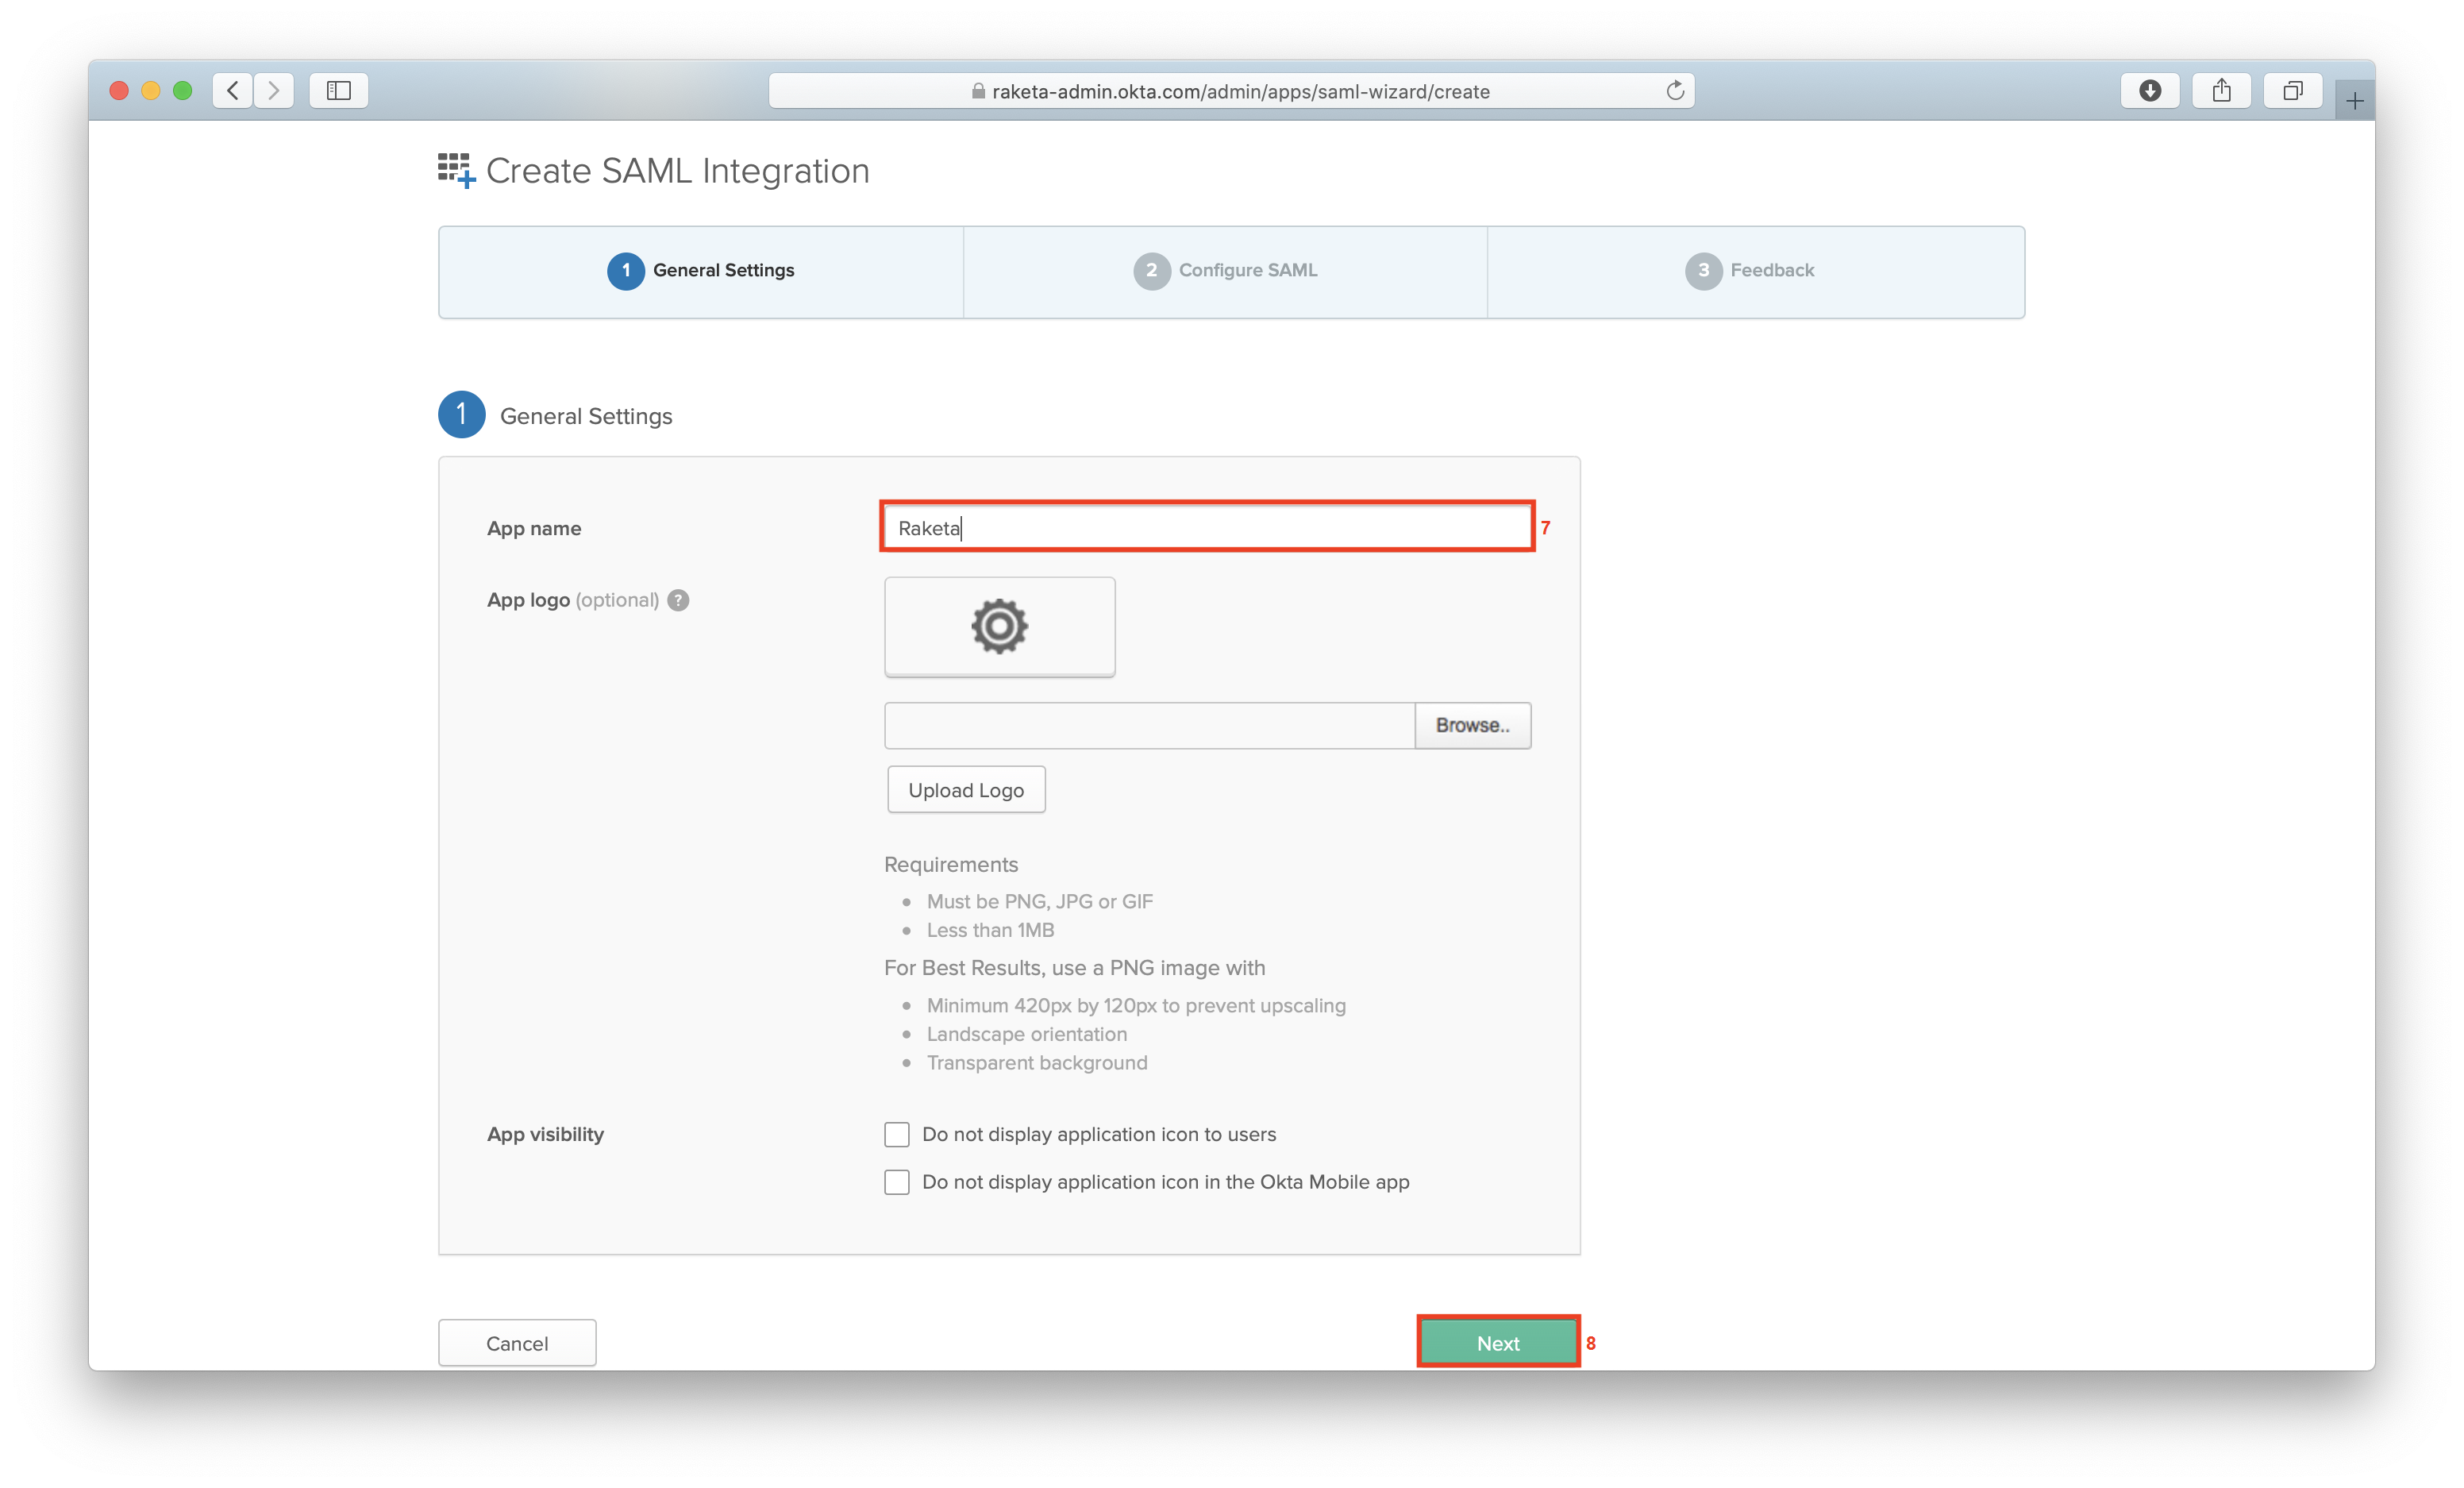
- In the first step of integration, specify the application name [7] and click the "Next" button [8].
- In the second step, fill out the form with the data provided by Raketa. Specify:
- Single sign on URL [9]: https://raketa.travel/sso/acs?clientId=RAKETA_CLIENT_ID
- Audience URI (SP Entity ID) [10]: https://raketa.travel
- Name ID format [11]: EmailAddress
- Application username [12]: Email.
Then click the "Next" button [13].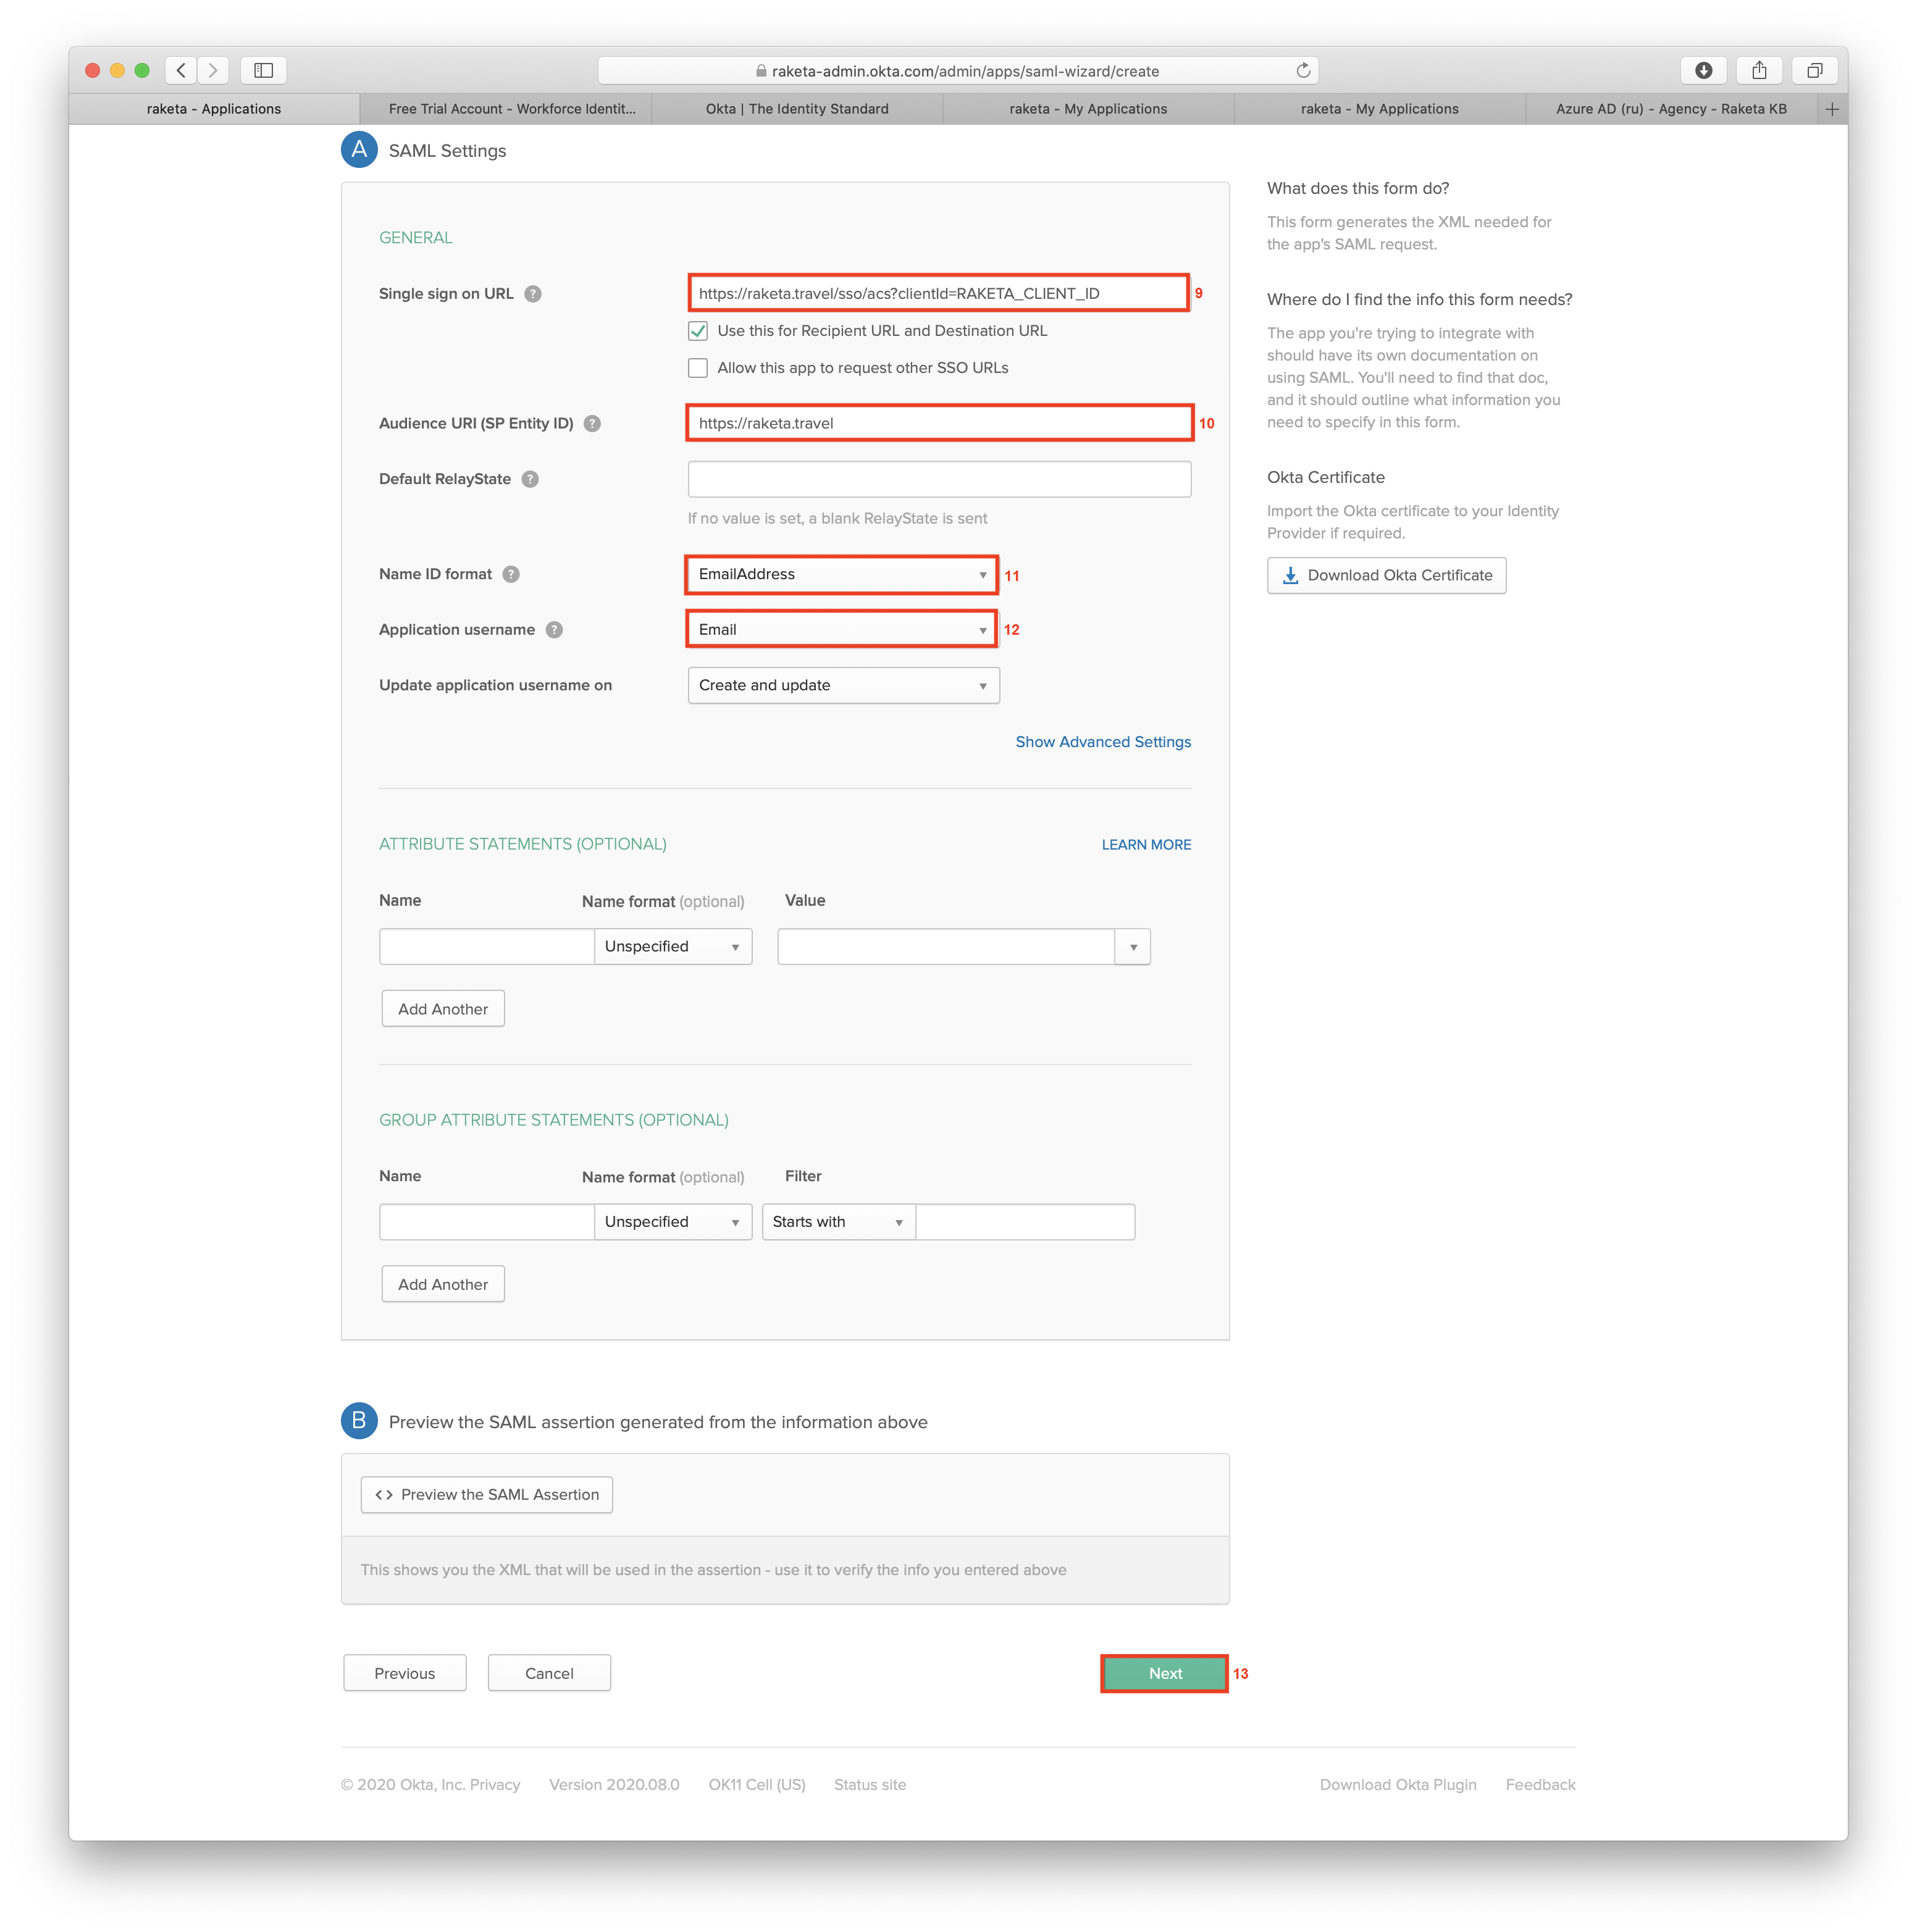
- In the third step, click the "Finish" button [14] to complete the integration.

- Click the "View Setup Instructions" button [15] to review the received settings.
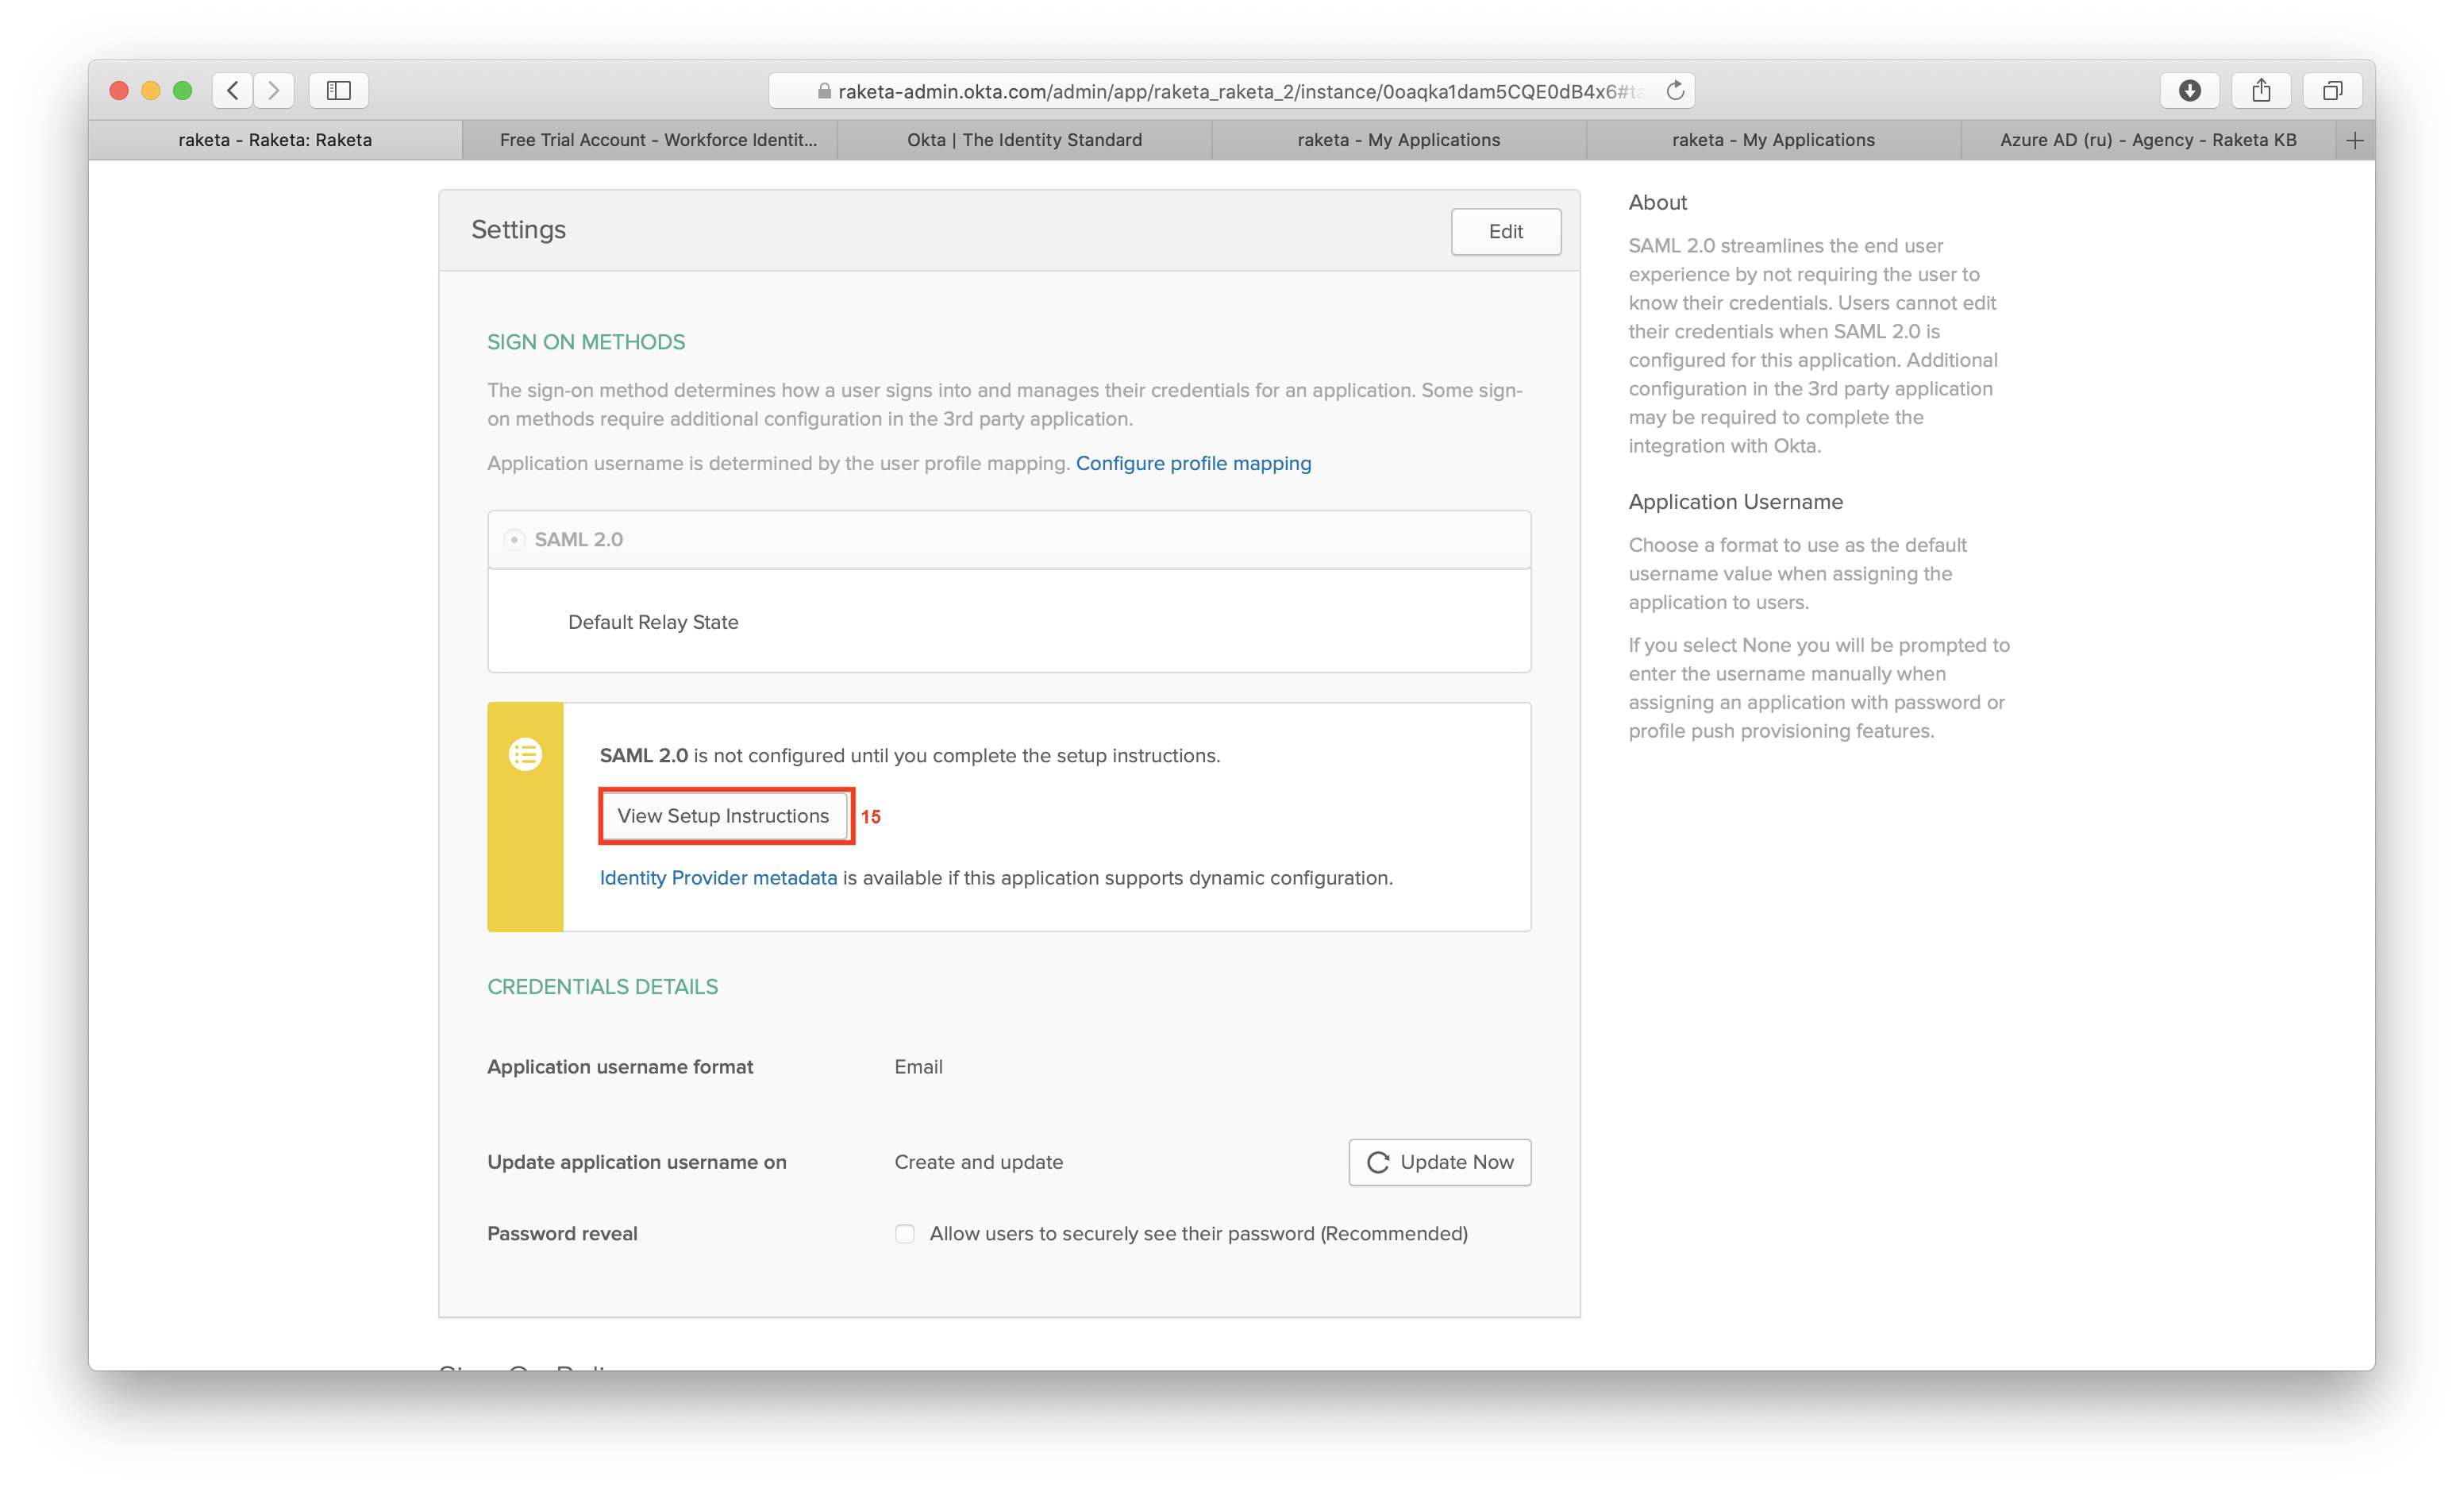
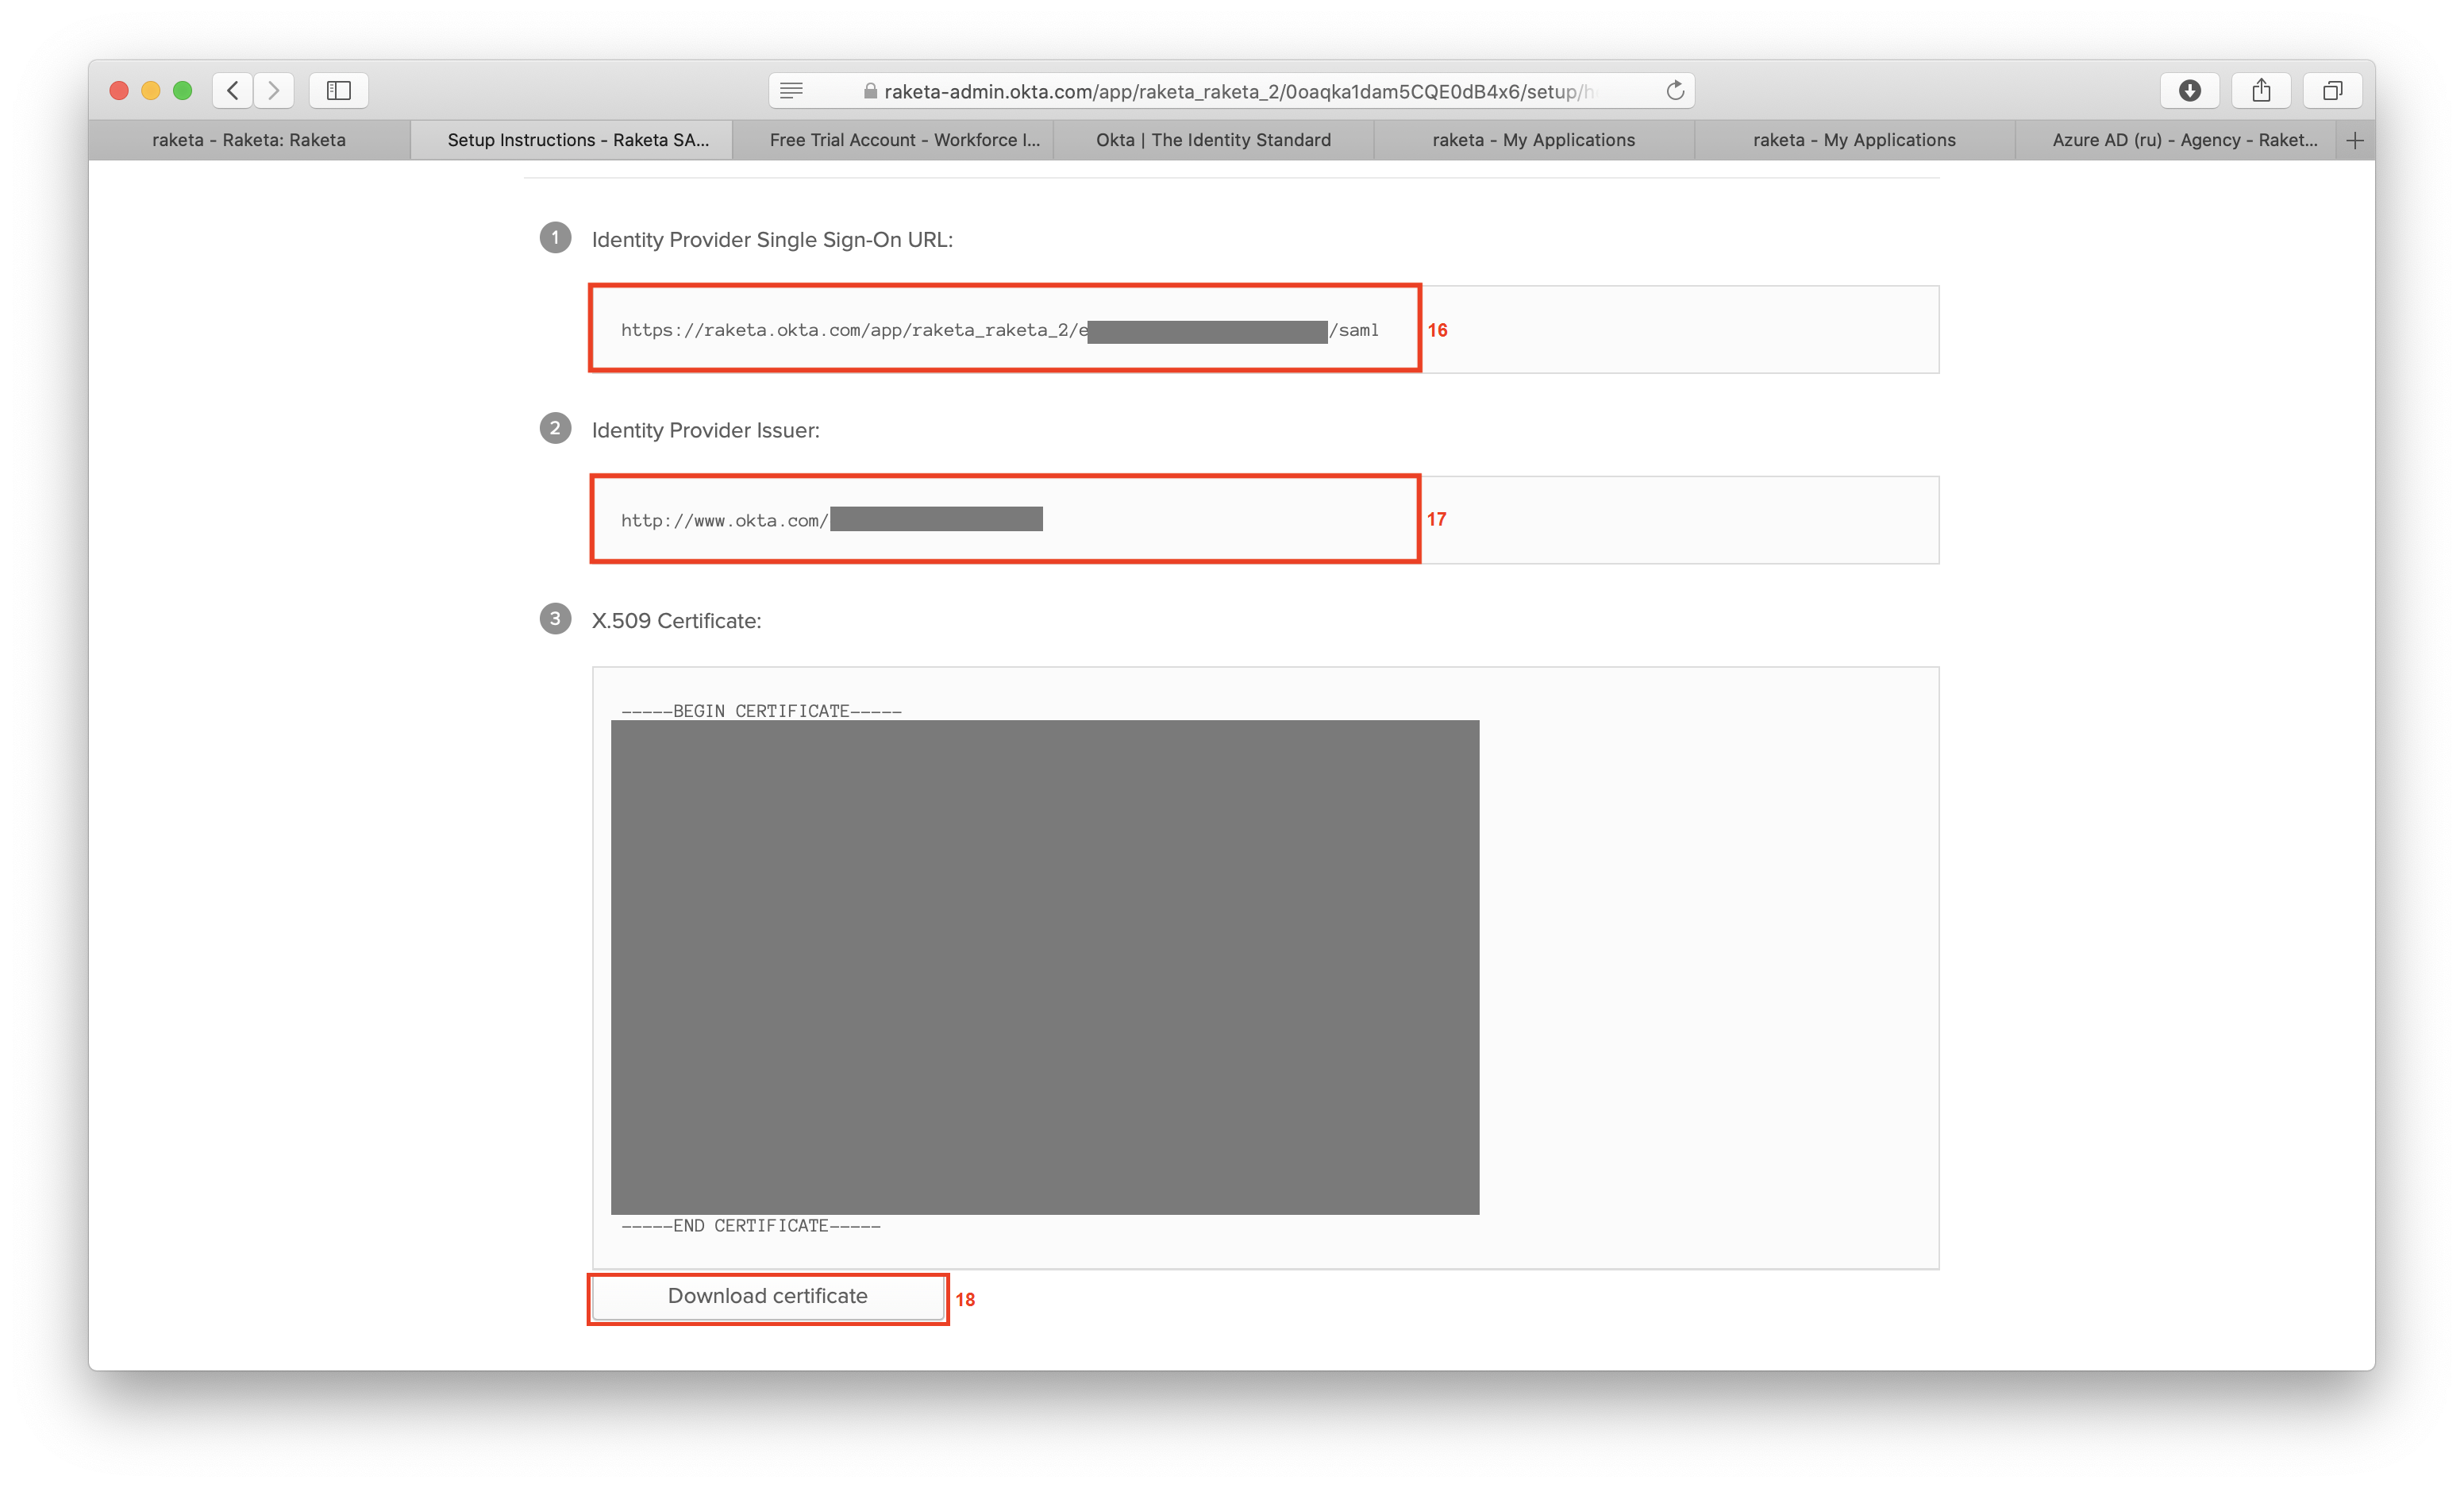
- Provide auto-generated data to Raketa:
- Identity Provider Single Sign-On URL [16].
- Identity Provider Issuer [17].
- X.509 Certificate - click the "Download certificate" button [18] to download it.